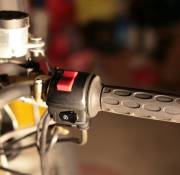
“It is super easy to modify the R6 controls to accept the FZR throttle cables. Beyond that, it is some simple wiring.”~ThatKid
Mounting The Housing and Throttle Cables
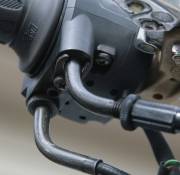
The 2005 R6 throttle cables are too long for the FZR so you must use the stock cable. After taking the 2005 R6 controls off, I drilled out the left hole so that it was circular. Not sure what size drill bit I used but my FZR cable housing fits in there incredibly snug. I have no worries about it coming out. The stock FZR “C” shaped washer/clamp thing bolts right up to the R6 control to lock in that side of the throttle cable. I tapped the right hole to accept the FZR return cable. I used an M8 tap and it screwed right in. That is it! 2005 R6 controls for a nicer look and updated internals.
Additional note: You don't even actually need to tap for the return cable. Since the R6 housing is plastic, the return cable screws in easily.
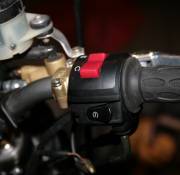
On the 2005 R6 throttle control; there is a goofy little pin on the inside that keeps them from seating on the bars correctly. My guess is that the R6 has a hole drilled into the handle to allow this pin to drop through to prevent the controls from moving. I grabbed it with some pliers and yanked it out as it is glued into the housing.
You may want to drill a hole in the bar to prevent rotation of the housing when the throttle is used. Since the R6 housing is plastic, it does not clamp on the bars the way the steel FZR ones do, and that is why the little pin is there to prevent rotation.
Modifying the Wiring Harness
:!:The headlight is wired permanently on once you move the key to the on position. Hitting the start button will not cut off the headlight to make more power for the starter and coils. This is easily solved by upgrading the coils to the Ford coil pack.
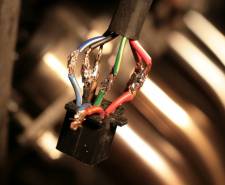
The right side is the easiest to wire so we will start there. I am thanking Naes right now because he walked me through all of this. Cut off the FZR plug from the controls, you will be reusing it. Now cut off the plug from the R6 controls. Strip all the wires and get ready to solder them together. This is how it is going to connect. The FZR uses two red/white wires for the kill switch. Below I have illustrate how to hook up the wires from the 2005 R6 to the FZR.
Note: The Red/Yellow and Blue/Black on the FZR harness are for the headlights. These are open circuit when the FZR start switch is pressed. Since this functionality is not on the R6 switch (the lights stay on when start is pressed as mentioned above), we just connect these 2 wires together. These 2 wires have to be connected together or you will get no headlights.
| FZR Color Wire | → | 2005 R6 Color Wire |
|---|---|---|
| Blue/Black (connect to Red/Yellow) | → | - |
| Red/Yellow (connect to Blue/Black) | → | - |
| Blue/White | → | Blue/White |
| Green/Yellow | → | Green/Yellow |
| Black | → | Black |
| Brown | → | Brown |
| Red/White (On corner of plug) | → | Red/Black |
| Red/White (On middle of plug) | → | Red/White |
| FZR Color Wire | → | 2005 R6 Color Wire |
|---|---|---|
| Yellow/Red to Black | → | Black/White |
| Blue/Black to Green | → | Red/Yellow |
| Yellow | → | Yellow |
| Brown | → | Pink |
| Brown/White | → | Brown/White |
| Chocolate | → | Chocolate |
| Dark Green | → | Dark Green |
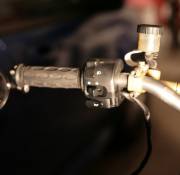
That is everything! It took some trial and error but everything is sorted out with this setup. The low beam will stay on all the time. The hi-beam switch will add the hi-beam light and the low beam will stay on as well so for those of you running non-stock headlights this may or may not be an issue. It will depend on the load being drawn if both lights are on. Anyhow, hope others go for this swap. It is somewhat nice to have 13-year newer controls on my bike!
-ThatKid


