Cleaning and Flushing your Brake Systems —- The FZR series motorcycles are an aging line of bikes, and with a little TLC these bikes will be on the road for many years to come and will be safe to ride.
An overlooked component that is vital to motorcycle safety is your brakes. Brake pads are not the only thing that needs to be replaced to maintain your brake system. Brake fluid is subject to the same degradation as everything else. Brake fluid absorbs moisture rapidly when exposed to the atmosphere which can lead to corrosion inside the brake system.
I have personally seen corrosion make my rear brake caliper junk. Although corrosion is not the only problem with old brake fluid, it needs to be flushed I would say at least every few years. Flushing removes contaminates that can block the tiny orifices in the master cylinders. With a blockage in the master cylinder you can apply the brakes and they may grab and not release. When the brakes get hot from the friction the fluid in the lines gets hot and applies the brakes harder until they lock up and/or warp the rotors etc. Brake lines are also a great item to watch or just replace. Make sure there are no cracks in the hoses and that they are not pinched or twisted.
This is a general procedure to clean your bake calipers by taking them apart and flushing the lines and master cylinders. This write up will help you remove and disassemble your calipers to clean them to minimize possibility of the calipers sticking and/or leaking. It is simple and cost little money.
All you need is regular tools like screwdrivers, air compressor, blow gun, pliers, wrenches, plenty of clean new brake fluid (a quart of Type DOT 4), soap and water and tooth brushes, Q-tips, scotch brite pads, and anything else to make the job easier.
This procedure is a general procedure and should work form most makes and models.
It will focus on how to disassemble the brake system to clean it. This is not required every year or anything, it is more of a just to see what condition it is in and clean everything really well.
Disks: I do not know which disks from which years will fit what bikes. I believe the disks from any year and model (FZR 400 or 600) will fit any year front wheel. Some disks are dished at the center rotor carrier and some are straight. Straight ones can be used in place of dished ones with little modification.
Calipers: The brake calipers in the pictures below are four piston ones. These calipers will only fit later model front forks. If you have two piston calipers on your bike these will not fit. The early 89 models FZR 600 originally had two piston type and later years had four piston type. 88-89 FZR 400s in the USA all originally had two piston ones and 1990s had four piston ones. The brake calipers are the same between the 400 and 600, as long as they have the same number of pistons.
This is what 2 piston front brake caliper looks like next to a fork that needs 4 piston calipers.

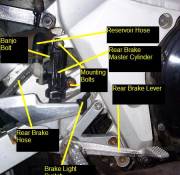
Removing and disassembling the rear is the same as the front.
When working on the rear pull the slip on muffler off. It makes working on it much easier. I even take it off to clean the rear wheel. I won't go into taking the rear all apart, because it is the same as the front.
Disassembly and cleaning front brake system
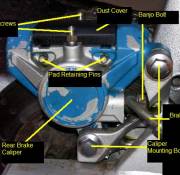
First off remove the brake pad by removing the dust cover.
Then remove the clips in the brake pad retaining pins. You may have to take needle nose pliers to turn the brake pad retaining pin to move the clip into a position where you can grab it.
Then remove the pad retaining pins by pulling them out. You may need pliers.
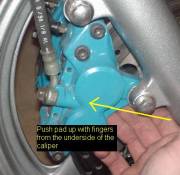
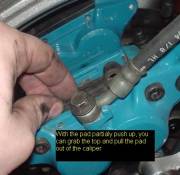
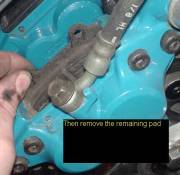
Then remove the pads. You can push the pad up with your fingers from the underside of the caliper so that you can get a better grip on the top of the pad.
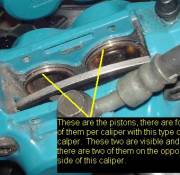
Then you are left with a caliper that is empty. Repeat this process to the caliper on the other side. Notice the pistons. There are four of them in a four piston brake caliper like these. There are only two in early model two piston designs.
Then you may begin taking them apart.
First break loose the parting flange bolts on each side for both calipers. Do one bolt at a time then tighten them lightly (little more than finger tight)
Then break lose the caliper mounting bolts.
Then Pump the front brake lever a few times to push the pistons out of their calipers. This will make removing the pistons easier later after taking the calipers off the forks. (I did not do this and you can see in the pictures below that all the pistons are nearly fully retracted in the caliper bodies, and they were a pain in the ass to get out.)
Then break lose the banjo bolts and unscrew them. Save the copper washers that are located on each side of the banjo fitting on the end of the hose. DO NOT LOSE THEM. Hold the hose in a container and allow the fluid to drain from the hose.
Un-bolt the caliper from the fork and remove it.
Remove the cap on the bleed screw and loosen the bleed screw with a wrench and turn it counter-clockwise and let fluid in the caliper drain out from the banjo bolt boss and the bleed screw. Unscrew the bleed screw completely and check for corrosion. If you let the caliper drain it will be less messy later on.
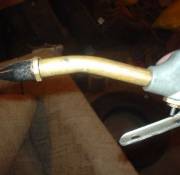
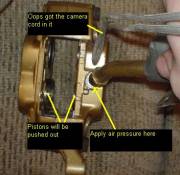
Then take an air blow gun and push compressed air into the banjo bolt boss. Be careful how you do so because the pistons will pop out of the calipers with a “BANG” and may injure you. Sometimes they can be real sticky and be difficult to remove but you can do it. You will need to be resourceful and plug holes or blow into the hole that links the two pistons together to get the remaining piston to pop out. Just play with them and you can get it done.
Then take the parting flange bolts all the way out and this is what you will have. You cannot predict which piston will come out first but this will give you a good idea of how to deal with the rest of the process.
After removing the parting flange bolts, set the o-ring in a soapy water bath and DO NOT LOSE THEM!!!
You are going to have to play around with them to get the rest of the pistons out covering holes and apply pressure to one hole to make them pop out.
Then you will be left with two empty caliper halves like this.
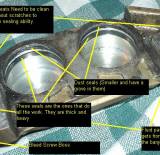
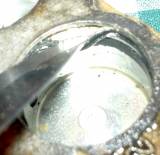
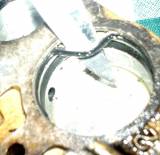
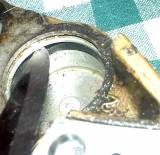
That's all there is to disassembling the calipers. Now spend lots of time cleaning them up. Make sure to get the seal groves squeaky clean use toothpicks and flat pieces of plastic to scrape any dried crap out of them.
Take scotch brite pad and scrub the outside of the pistons to remove all contaminates and check their condition.
Be sure to inspect the seals themselves. The smaller dust seal is not a critical item but the large seals are and must be in good condition.
When you re-assemble them take a Q-tip and dip it into clean brake fluid and fill the seal groves with new brake fluid. I like to soak the seal in new brake fluid while re-assembling them. Lube the outside diameter of the pistons with brake fluid.
Put the seals in and then just press the pistons back into the bodies with your hands. They should slide right in, they may bind if they are not straight in the hole.
Then lube up the parting flange seals and bolt the calipers back together.
Master Cylinders
Front master cylinder
To inspect the contents of the fluid in the front master cylinder:
Turn the handle bars to the right and break loose the screw on the reservoir cover.
Then turn the handle bars to the left and finish removing the screws and cover.
You must do it this way to prevent the fluid in the reservoir from running out the top
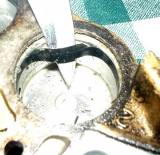
Look inside it. It should look like this, the fluid should be clear (the camera made the fluid look dark) and the bottom of the reservoir should be spotless. You should take out the metal tab to check under it.
Clean up the rubber diaphragm and the cover to prevent fluid contamination.
Do not fill the reservoir full or it will leak and ruin any paint it remains on for more than 5 minutes.
When the brake system has been opened up you must bleed the system to remove any air that may have entered the system. Air is compressible and when it is in your brake system it will give you spongy brakes that do not operate well.
The rear caliper is a pain to bleed, so here is some help. For the rear brake caliper, the hose goes from the MC up and back down to the caliper. This allows air to be trapped at the high point in the line.
REAR Caliper Bleeding:
- Unscrew the banjo bolt, pull the bolt out of the brake line. Set the bolt aside. Loosen the bleed screw.
- Remove the brake pads from caliper. Then remove caliper from the bracket.
- Unscrew the master cylinder filling cap and fill with fluid.
- With your left hand hold your index finger and thumb and pinch the loose end of the brake line to cover the holes that the banjo bolt passes through.
- While doing step 3 slowly pump the brake lever until fluid is squirting out of the line between your fingers. REMEMBER you will have to keep adding fluid to the reservoir to make sure you don't pump air back into the line. Hold the line up high and continue at least one more pump. Keep Loose end of brake line up in the air to prevent fluid from running out and air entering the line.
- Put the banjo bolt back into the brake line making sure there is a copper crush gasket under the head.
- Then pick up the caliper with one hand and screw the banjo bolt into the caliper with a copper crush gasket on caliper side of the bolt. Snug the Banjo bolt down with wrench.
- Bolt the caliper back on the bracket. And reinstall the brake pads.
- With one bleed screw loose, slowly press brake lever all the way and hold, tighten the bleed screw and slowly release the brake lever.
- Repeat step 9 until fluid runs out of bleed screw REMEBER to keep the master cylinder reservoir full of fluid at all times. Repeat for any remaining bleed screws.
- Check that all bolts are tight and screw on the master cylinder cap.
FRONT Brake System Bleeding
- Remove the front master cylinder reservoir cap. You must keep the reservoir full of fluid during all bleeding operations to prevent air from re-entering the system.
- Make sure all banjo bolts are tight and that the bleed screws are tight.
- Loosen one hose on the front caliper and remove it.
- Pinch banjo fitting on the end of this loose hose with you thumb and index finger and pump the brake lever slowly until fluid squirts out between your fingers. (this is priming the master cylinder)
- Re-install the brake hose and tighten the banjo bolt.
- Pump the brake lever and watch in the reservoir for air bubbles. Air bubbles coming up from the master cylinder means that the brake hoses and calipers are filling with fluid.
- After pumping the brake lever for what seems like eternity you should feel the brake lever getting stiffer as if your brakes are working but are spongy.
- Now you have to bleed the air out of the calipers.
- With the brake lever released or in the not applied position, open a bleed screw on one caliper.
- Then slowly press the brake lever watching the fluid that comes out of the bleed screw, and hold the brake lever.
- With the brake lever pressed all the way tighten the bleed screw.
- Slowly release the brake lever.
- Continue #9 through #12 until no air bubbles come out of the bleed screws and repeat for any remaining bleed screws.
- The brake lever should have a solid feel to now and if not continue pumping and bleeding until you do. Check and add fluid if necessary and re-install the reservoir cover.
- After a few days of riding bleed the calipers again to assure that all air is out.
-BNT83


