Project Freestyle
Moderators: Site Director, FZR Forum Moderators
-
Freestyle72
- Level 4.0

- Posts: 418
- Joined: Sun May 10, 2009 8:23 am
- Location: Milton, Ontario, Canada
Re: Project Freestyle
The tank fits great with the subframe, and doesn't do too bad with the FZRs frame lines either. But the big problem is that it's shorter than the FZRs frame so I am going to have get slighly creative in getting that space to look slightly less empty.
-
Freestyle72
- Level 4.0

- Posts: 418
- Joined: Sun May 10, 2009 8:23 am
- Location: Milton, Ontario, Canada
Re: Project Freestyle
Tonight I made a stiffener ring so that I could get the R1 boot to clamp firmly onto the yzf600 boots. So far so good. Going to have to grind it down a little bit and port it to the opening in the boot as not to restrict airflow too much.
This was cut from 1.66" aluminum pipe which on the caliper measure out to be 41.7mm instead of the 42.2mm it's supposed to be. Which is ok for me because the YZF boots are 41mm ID. I think I am going to turn the stiffener down to 41mm or 40.5 for easier boot installation. It sure does seal up nice and tight with the yzf boot though. I know it's a small update but I am getting killed at work so my creative potential after work at the moment is somewhat limited.


This was cut from 1.66" aluminum pipe which on the caliper measure out to be 41.7mm instead of the 42.2mm it's supposed to be. Which is ok for me because the YZF boots are 41mm ID. I think I am going to turn the stiffener down to 41mm or 40.5 for easier boot installation. It sure does seal up nice and tight with the yzf boot though. I know it's a small update but I am getting killed at work so my creative potential after work at the moment is somewhat limited.


-
Freestyle72
- Level 4.0

- Posts: 418
- Joined: Sun May 10, 2009 8:23 am
- Location: Milton, Ontario, Canada
Re: Project Freestyle
Again another really tiny update. Made up some proper spacers out of half inch aluminum rod with 1/4" hole drill down the middle. They are approximately 22.5mm long. For those unaware it's the little aluminum spacer between throttlebody 2 and 3 right in the middle.

Test fit to make sure it's space ok and fits the boots correctly.


Test fit to make sure it's space ok and fits the boots correctly.

-
Freestyle72
- Level 4.0

- Posts: 418
- Joined: Sun May 10, 2009 8:23 am
- Location: Milton, Ontario, Canada
Re: Project Freestyle
Got some more done tonight.
Just got 4 stiffeners back from my machinist friend. 40.75mm OD 38mm ID and 8mm tall.

In the boot.

Top on and tightened. Damn near inseperable.

Damn iphone camera. Put the buts all back together clamped down good and stuck the throttlebodies in there. I have 50psi fuel line linking the two halves of the fuel rail for now until I can get it welded together.
So basically mechanically speaking everything ready to at least get the bike idling. The only barrier at this moment is doing the wiring up now so that will be my next focus. Integrating the Microsquirt harness with the R6 harness is my next goal. I still need some connectors that connect to the 06/07 R6 fuel pump. I am not exactly sure where I can buy those parts from. And after that I need an IAT sensor and it will be electrically complete.
Just got 4 stiffeners back from my machinist friend. 40.75mm OD 38mm ID and 8mm tall.

In the boot.

Top on and tightened. Damn near inseperable.

Damn iphone camera. Put the buts all back together clamped down good and stuck the throttlebodies in there. I have 50psi fuel line linking the two halves of the fuel rail for now until I can get it welded together.
So basically mechanically speaking everything ready to at least get the bike idling. The only barrier at this moment is doing the wiring up now so that will be my next focus. Integrating the Microsquirt harness with the R6 harness is my next goal. I still need some connectors that connect to the 06/07 R6 fuel pump. I am not exactly sure where I can buy those parts from. And after that I need an IAT sensor and it will be electrically complete.
Re: Project Freestyle
Stock R6 IAT - http://cgi.ebay.ca/03-05-YAMAHA-R6-06-0 ... 43a62768ff; see if he'll go realistic on the shipping.
I cheated on the connectors - I bought a harness for cheap!
I cheated on the connectors - I bought a harness for cheap!
1989 3LN1 FZR250R, currently stock.
TTR Ignition Systems
TCI Repair and Ignition Transistor Upgrade
VRR Adaptor Harness
YZF600 TCI Adaptor
Running Light Fuse Carrier
TTR Ignition Systems
TCI Repair and Ignition Transistor Upgrade
VRR Adaptor Harness
YZF600 TCI Adaptor
Running Light Fuse Carrier
-
Freestyle72
- Level 4.0

- Posts: 418
- Joined: Sun May 10, 2009 8:23 am
- Location: Milton, Ontario, Canada
Re: Project Freestyle
I may have a lead on a damaged harness with those plugs, hopefully that works out.
I am torn right now I am wondering if I should use the GM IAT or buy an R6 airbox with IAT in it and try to make that fit the bike.
I am torn right now I am wondering if I should use the GM IAT or buy an R6 airbox with IAT in it and try to make that fit the bike.
Re: Project Freestyle
Pictures no workie.  very sad... I want to see what's going on!
92' FZR 600 non EXUP *project bike*
93' CBR 600 F2
93' CBR 600 F2
-
Freestyle72
- Level 4.0

- Posts: 418
- Joined: Sun May 10, 2009 8:23 am
- Location: Milton, Ontario, Canada
Re: Project Freestyle
I re-organized my Photobucket account because I had like 700-800 pictures all in one album and it was super hard to find anything. So I made like 10 different albums and moved the pictures and it broke all the links.
Anyways I picked up an 03/04 Airbox (same as my throttlebodies). I also got the top half of an 06+ R6 airbox which has shower injectors in and the IAT sensor I am looking for so I am robbing that off it. The great news is the 03 04 R6 airbox easily fits the FZR frame. If it weren't for the cylinder spacing it would fit right on. I also have a yzf600 airbox was way too wide to fit without some pretty major surgery. So I am going to try to use parts of each airbox to achieve a combined box that bolts onto the throttlebodies and uses an OEM air filter. I also got the connectors for the fuel pump and fuel level sensor that plug into the bottom of the tank. Just have to finish up some wiring and then study my microsquirt instructions a little bit more to figure out what to use for a basemap and such.
Anyways I picked up an 03/04 Airbox (same as my throttlebodies). I also got the top half of an 06+ R6 airbox which has shower injectors in and the IAT sensor I am looking for so I am robbing that off it. The great news is the 03 04 R6 airbox easily fits the FZR frame. If it weren't for the cylinder spacing it would fit right on. I also have a yzf600 airbox was way too wide to fit without some pretty major surgery. So I am going to try to use parts of each airbox to achieve a combined box that bolts onto the throttlebodies and uses an OEM air filter. I also got the connectors for the fuel pump and fuel level sensor that plug into the bottom of the tank. Just have to finish up some wiring and then study my microsquirt instructions a little bit more to figure out what to use for a basemap and such.
-
Freestyle72
- Level 4.0

- Posts: 418
- Joined: Sun May 10, 2009 8:23 am
- Location: Milton, Ontario, Canada
Re: Project Freestyle
Ok so I have been doing a lot of staring at wiring diagrams and talking it over with a super intelligent fellow (DonTZ) and I think I am ready to have this thing idling this week. I have all the sensors, and I am 99% finished wiring. I just need to hook it all up on the bike. I have done all the wiring I can do to get it to a plug and play state.
Here are some pics to prove I haven't been doing nothing!
Stopped by PA and bought a bunch of stuff
Microsquirt harness with R6 injection connectors soldered on..
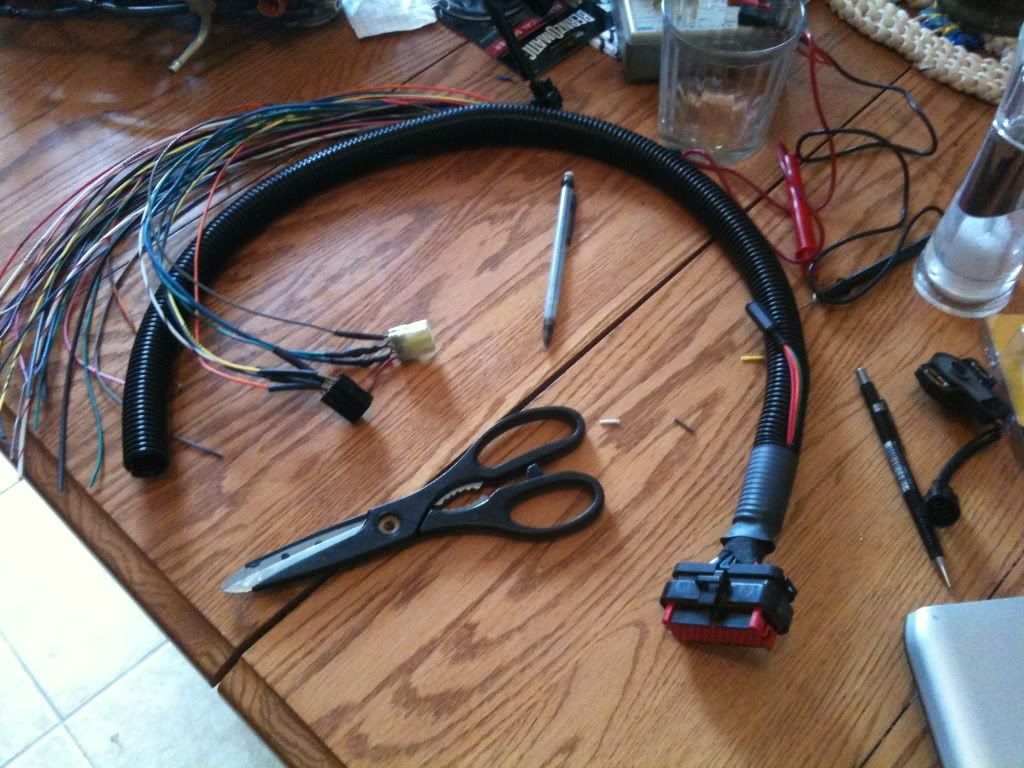
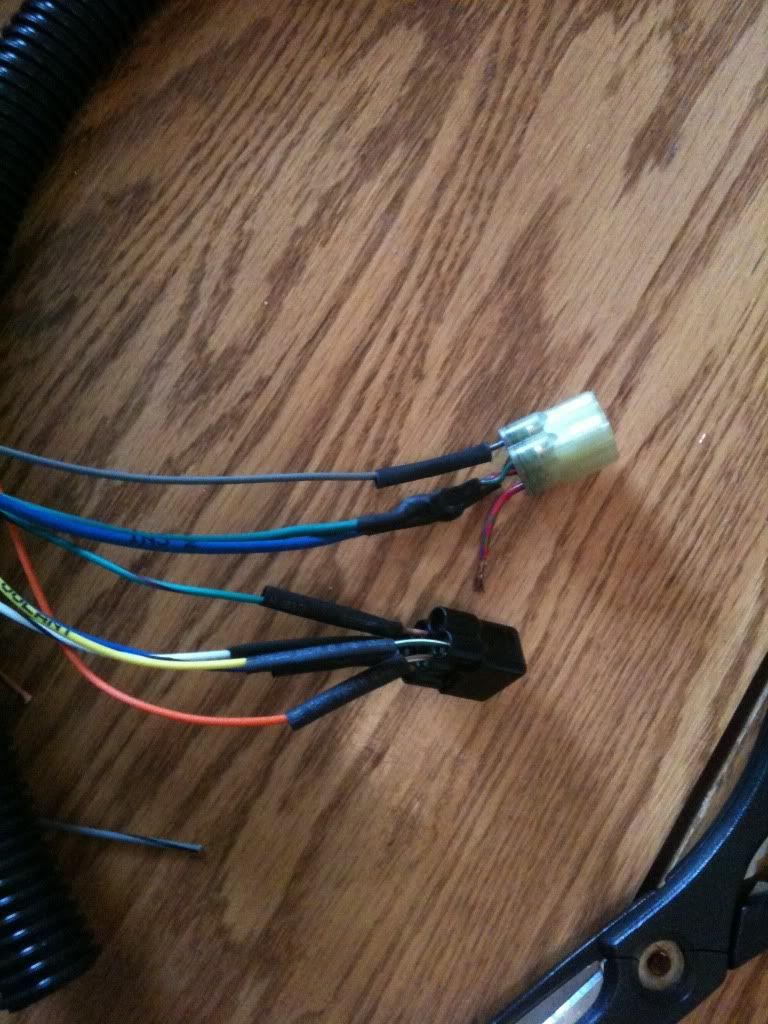
The lonely wire is the injector power (+)
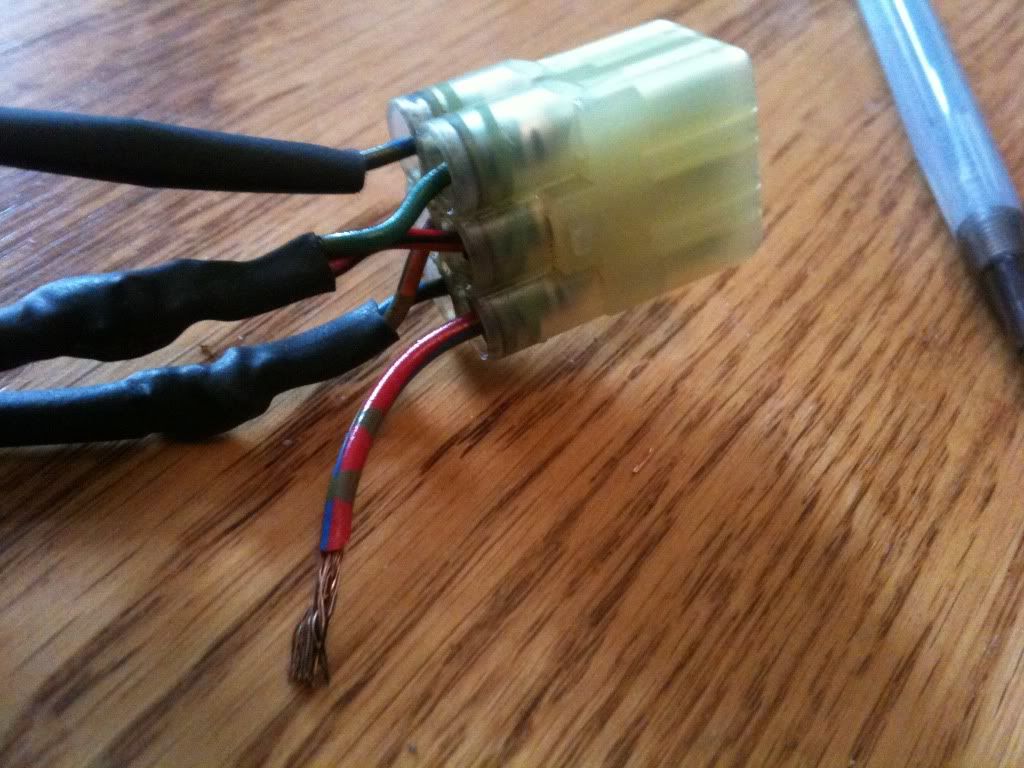
The other connector is fully wired this one is all inputs from sensors like CLT, IAT, MAP, TPS
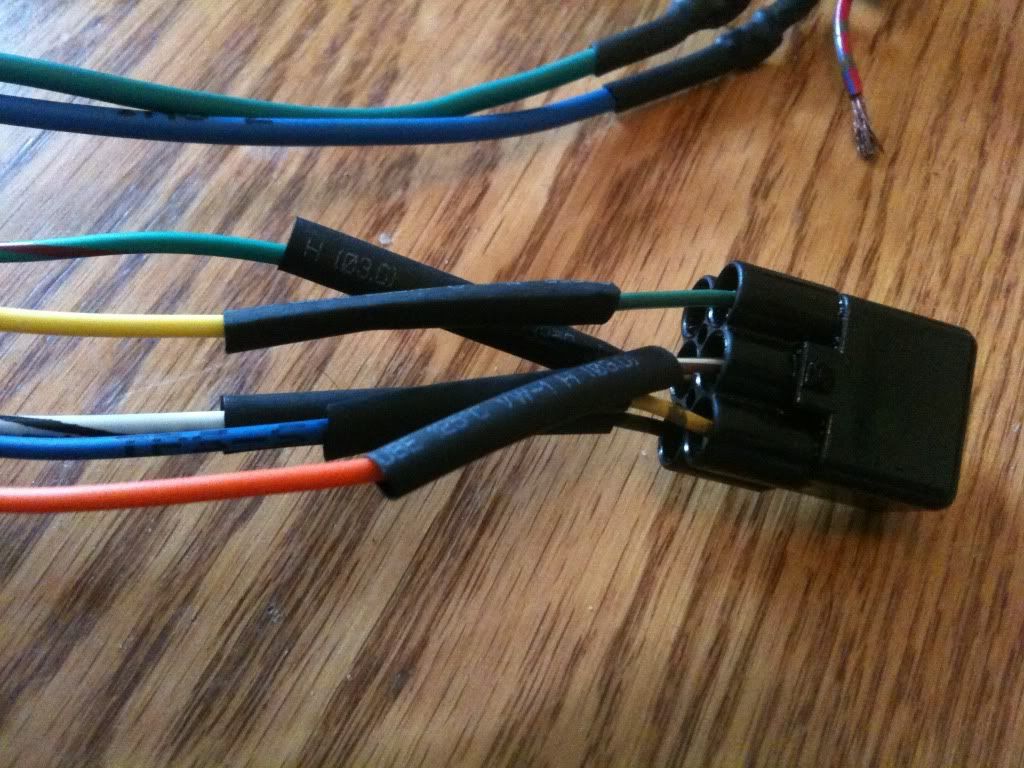
All together
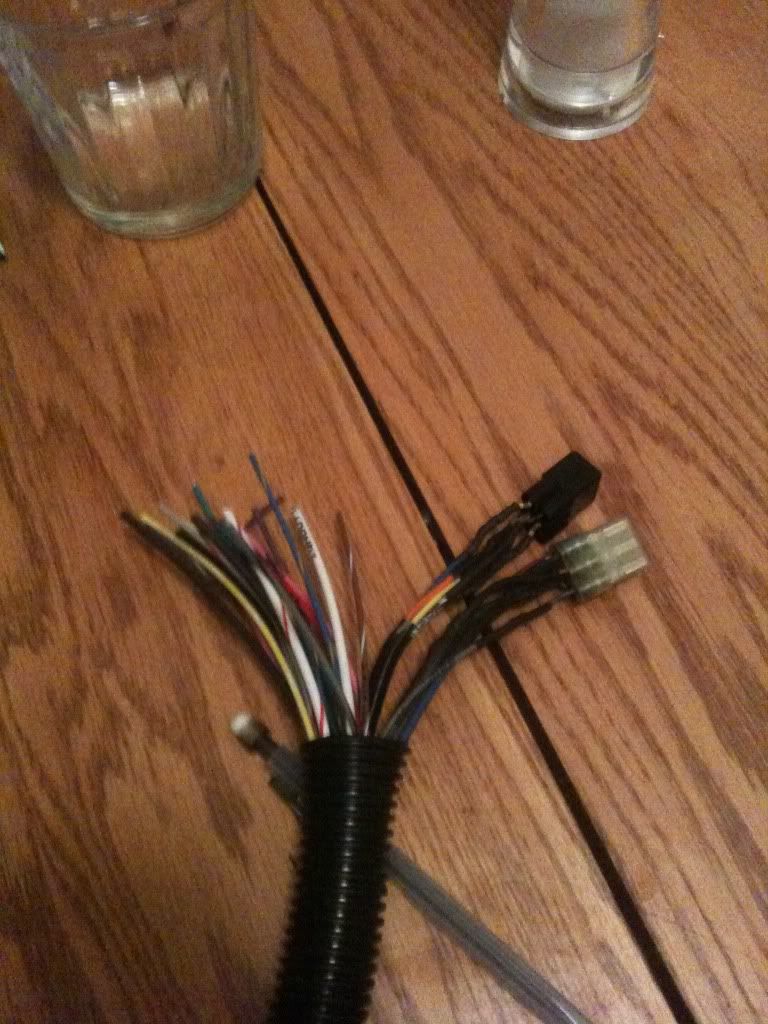
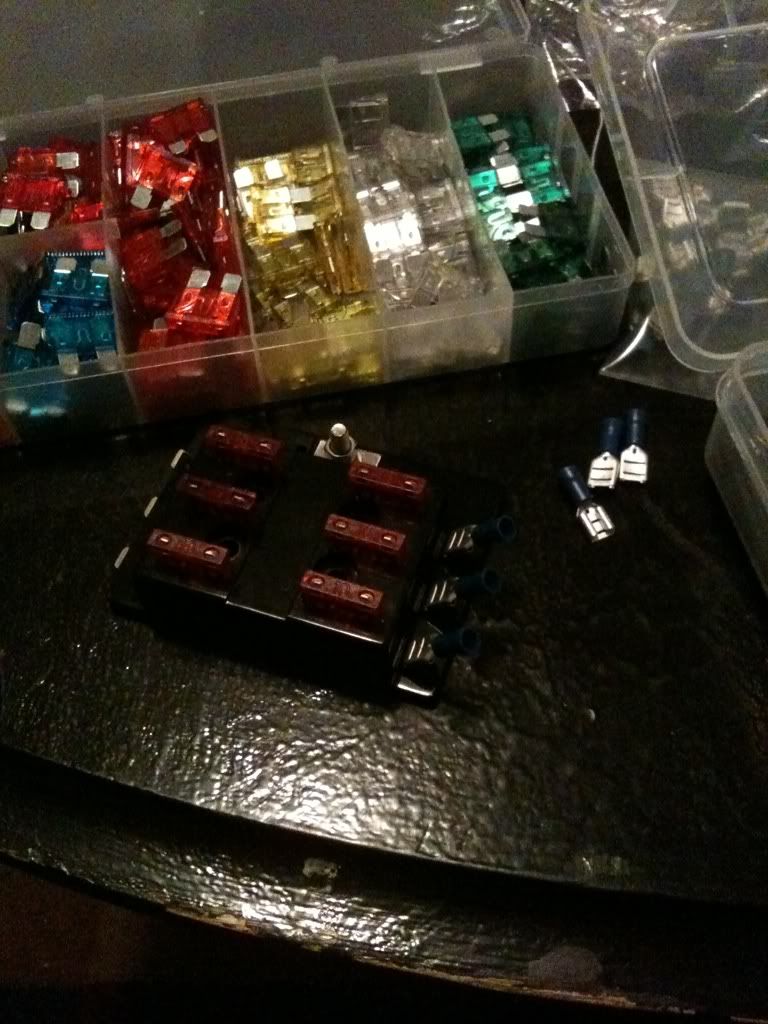
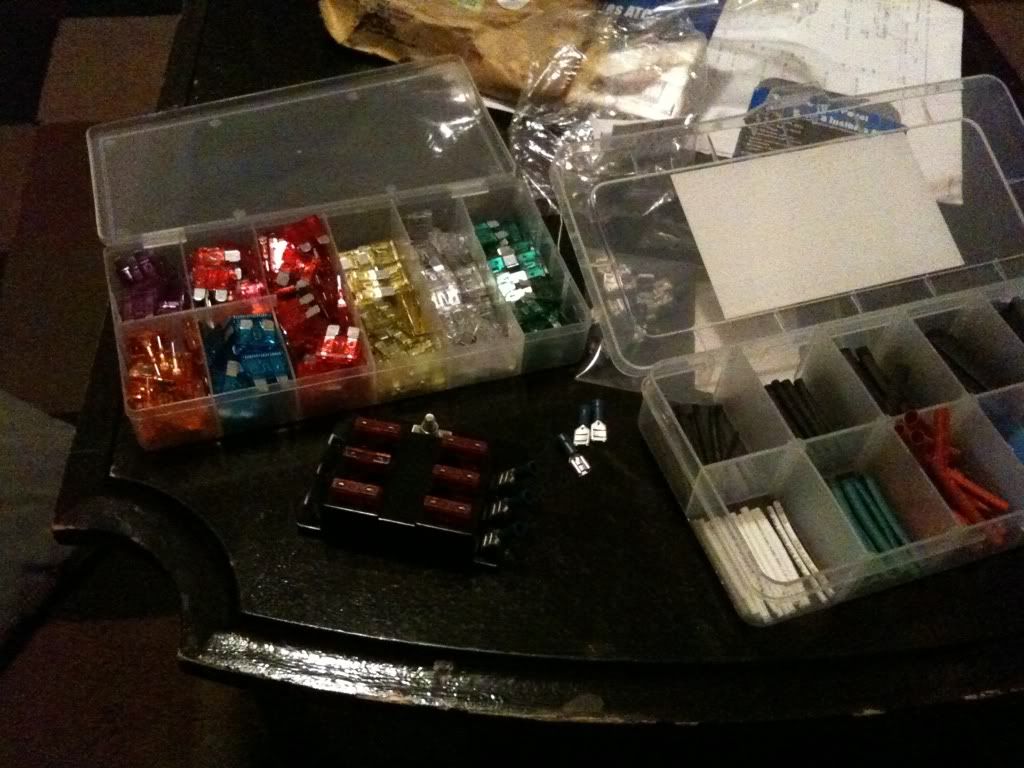
Then I got to making some connectors for my new EFI fuse box that I will run independant of the stock fusebox for easy trouble shooting. Double heat-shrinked for a nice finish.


What you see here is the fuel pump power and injector power

The fuel pump plug that I got off of a local racer along with a bunch of other stuff... There you can see the connector, power, and ground. The power runs through the fuse box in the picture above. And the ground I looped for easy grounding anywhere.

Here are some pics to prove I haven't been doing nothing!
Stopped by PA and bought a bunch of stuff


Microsquirt harness with R6 injection connectors soldered on..


The lonely wire is the injector power (+)

The other connector is fully wired this one is all inputs from sensors like CLT, IAT, MAP, TPS

All together

Then I got to making some connectors for my new EFI fuse box that I will run independant of the stock fusebox for easy trouble shooting. Double heat-shrinked for a nice finish.


What you see here is the fuel pump power and injector power

The fuel pump plug that I got off of a local racer along with a bunch of other stuff... There you can see the connector, power, and ground. The power runs through the fuse box in the picture above. And the ground I looped for easy grounding anywhere.

-
Freestyle72
- Level 4.0

- Posts: 418
- Joined: Sun May 10, 2009 8:23 am
- Location: Milton, Ontario, Canada
Re: Project Freestyle
http://www.youtube.com/watch?v=4nPnQkzGN5U
EFI running on my FZR... been a long road but it finally runs... Still a long road a head in terms of tuning and such but this is a real breakthrough for me.
EFI running on my FZR... been a long road but it finally runs... Still a long road a head in terms of tuning and such but this is a real breakthrough for me.
Re: Project Freestyle
Good stuff! Sounds a little rough, but that's just a matter of tuning it in (and fitting the airbox!  )
)
Oh - the missus says to tell you, she wasn't kidding when she declared that the fee for phone consultations with her husband - on a Sunday evening! - is a large bag of "Farmers' Market" 2-bite Brownies (from No Frills) and a package of Nibs candy.
Glad to see it works!
Oh - the missus says to tell you, she wasn't kidding when she declared that the fee for phone consultations with her husband - on a Sunday evening! - is a large bag of "Farmers' Market" 2-bite Brownies (from No Frills) and a package of Nibs candy.
Glad to see it works!
1989 3LN1 FZR250R, currently stock.
TTR Ignition Systems
TCI Repair and Ignition Transistor Upgrade
VRR Adaptor Harness
YZF600 TCI Adaptor
Running Light Fuse Carrier
TTR Ignition Systems
TCI Repair and Ignition Transistor Upgrade
VRR Adaptor Harness
YZF600 TCI Adaptor
Running Light Fuse Carrier
Re: Project Freestyle
That's actually a fairly smooth idle given the circumstances. Glad it's working though  Will need video of wheelie burnouts now..
Duane...
Bike:
1994 Yamaha FZR 1000 EXUP
Factory Pro Stage 1 Jetting | K&N Filter | Corbin Seat | ProTek Keyless Gas Cap | GSXR Mirrors
My Thread
Cage:
2005 Saab 9-7x 5.3i Arc AWD
THE WIKI IS YOUR FRIEND
THE SEARCH IS YOUR SIGNIFICANT OTHER
USE THEM!!
Bike:
1994 Yamaha FZR 1000 EXUP
Factory Pro Stage 1 Jetting | K&N Filter | Corbin Seat | ProTek Keyless Gas Cap | GSXR Mirrors
My Thread
Cage:
2005 Saab 9-7x 5.3i Arc AWD

THE WIKI IS YOUR FRIEND
THE SEARCH IS YOUR SIGNIFICANT OTHER
USE THEM!!
-
Freestyle72
- Level 4.0

- Posts: 418
- Joined: Sun May 10, 2009 8:23 am
- Location: Milton, Ontario, Canada
Re: Project Freestyle
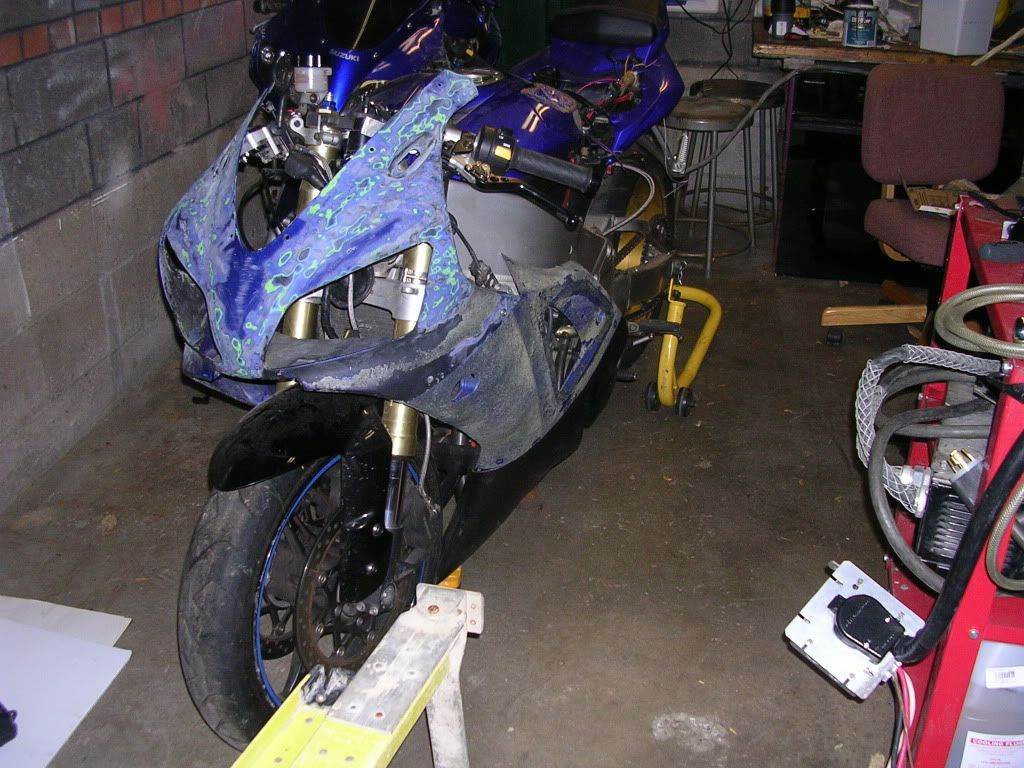

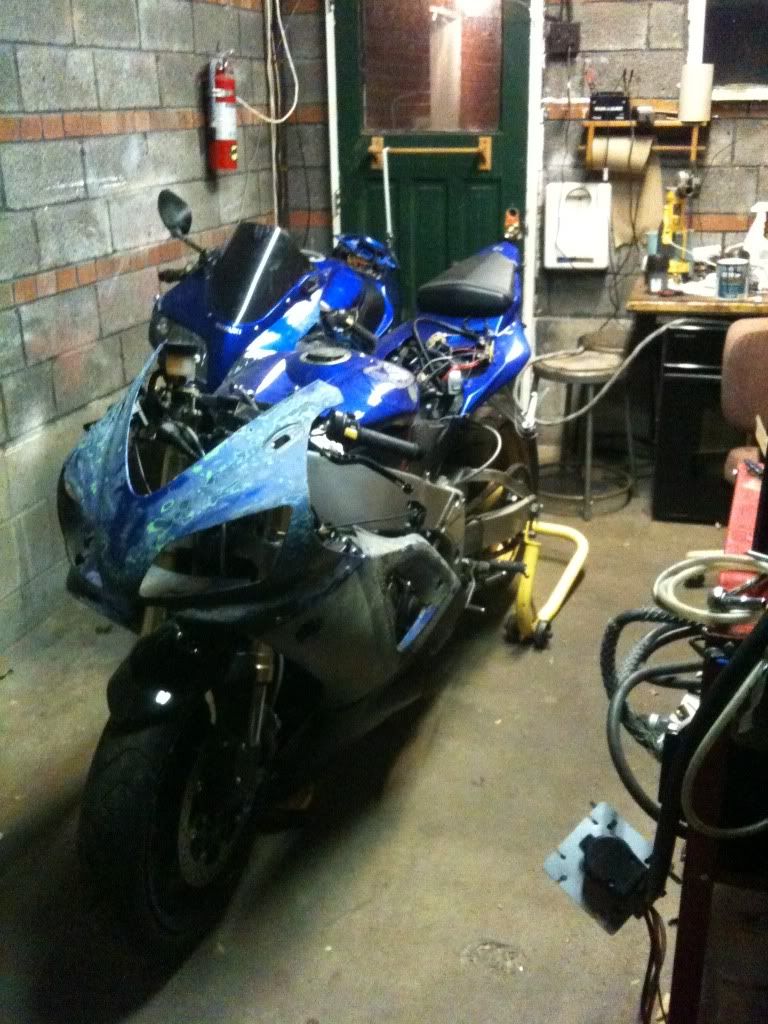
For paint I am thinking a more modern Wayne Rainey Yamaha/Marlboro deal.
Re: Project Freestyle
So why does this seem like the easiest part of the evolution of this bike? I dig it either way though. 
Duane...
Bike:
1994 Yamaha FZR 1000 EXUP
Factory Pro Stage 1 Jetting | K&N Filter | Corbin Seat | ProTek Keyless Gas Cap | GSXR Mirrors
My Thread
Cage:
2005 Saab 9-7x 5.3i Arc AWD

THE WIKI IS YOUR FRIEND
THE SEARCH IS YOUR SIGNIFICANT OTHER
USE THEM!!
Bike:
1994 Yamaha FZR 1000 EXUP
Factory Pro Stage 1 Jetting | K&N Filter | Corbin Seat | ProTek Keyless Gas Cap | GSXR Mirrors
My Thread
Cage:
2005 Saab 9-7x 5.3i Arc AWD

THE WIKI IS YOUR FRIEND
THE SEARCH IS YOUR SIGNIFICANT OTHER
USE THEM!!
-
Freestyle72
- Level 4.0

- Posts: 418
- Joined: Sun May 10, 2009 8:23 am
- Location: Milton, Ontario, Canada
Re: Project Freestyle
We'll see about how easy it actually ends up being. But I have been meaning to pretty the bike up some more and got the plastics and headlight for free from a local rider looking to convert it to a track bike... and by the way you are looking at hours of work to pretty up those fairings... hours with a sander... You don't even want to see what the fairings looked like before. They were wrapped in pleather and bondoed to look like bones underneath.
