Moderators: Site Director, FZR Forum Moderators


What do you mean by sealed? They are not sealedyamaha_george wrote:Very neat, would be good if you explained how you got the sealed gauges open without breaking the glass .................
SC,SquadraCorse wrote:I will put together a write up. Unfortunately I didn't take too many pictures at the start but it's all pretty easy, and I can fill the gaps in with some stock internet photos.
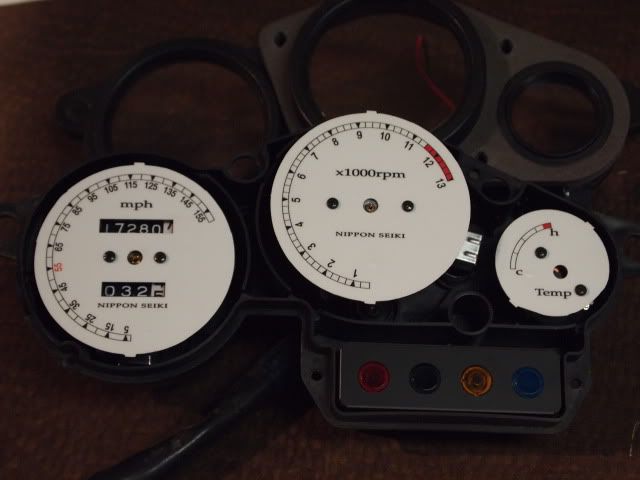
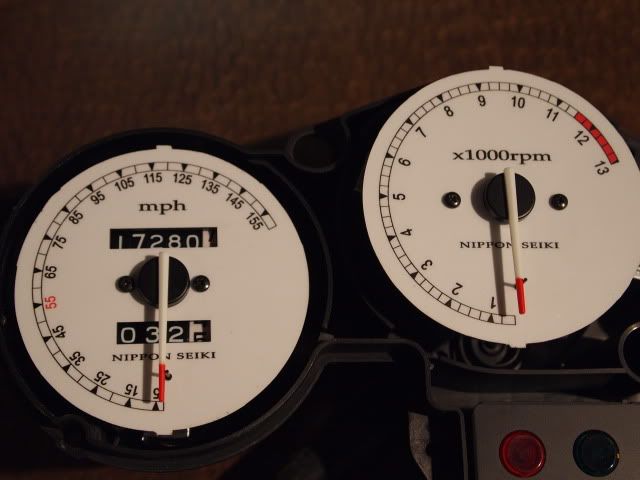
Total cost was probably about $40. I had a friend do the artwork in Adobe Illustrator ($0), a sign shop print them out on satin white vinyl with an opaque backing ($25), and the LED lighting was only $12. Some misc. odds and ends (RC car paint for the needle tips, electrical misc. for the lighting, etc.) (maybe $5). So it's real cheap and pretty simple, provided you can get the artwork done or do it yourself. I don't do any graphic design work, only mechanical design and CAD, so that area was a little out of my expertise. You could easily download Adobe Illustrator and work away at it though.yamaha_george wrote:SC,SquadraCorse wrote:I will put together a write up. Unfortunately I didn't take too many pictures at the start but it's all pretty easy, and I can fill the gaps in with some stock internet photos.
I read your blog on how you had the gauges "faked" seems that there could be quite a bit of interest here for them as I for one agree the night visibility is sh**e. The amount of pics is fine (and are very good quality I might add )
May I inquire what it approx. cost to do this ?
TG
the Yamaha gauges I have seen have always been sealed by some kind of waterproof sealant and a flanged over metal rim. are the FZR ones different ?
I must admit that because of this maybe erroneous belief I have not tackled the FZR versions.
SquadraCorse wrote:Total cost was probably about $40. I had a friend do the artwork in Adobe Illustrator ($0), a sign shop print them out on satin white vinyl with an opaque backing ($25), and the LED lighting was only $12. Some misc. odds and ends (RC car paint for the needle tips, electrical misc. for the lighting, etc.) (maybe $5). So it's real cheap and pretty simple, provided you can get the artwork done or do it yourself. I don't do any graphic design work, only mechanical design and CAD, so that area was a little out of my expertise. You could easily download Adobe Illustrator and work away at it though.
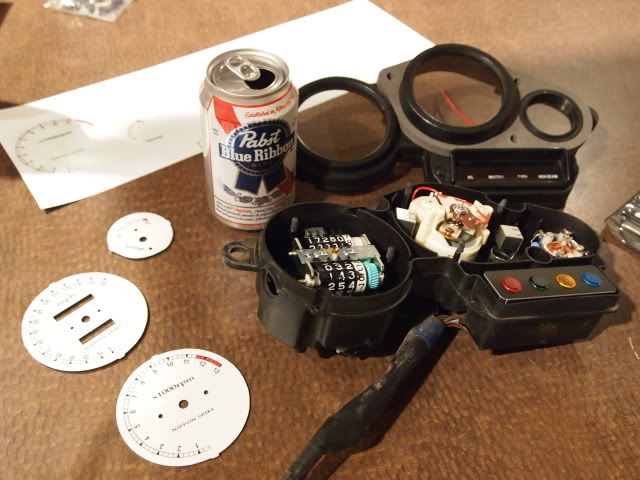
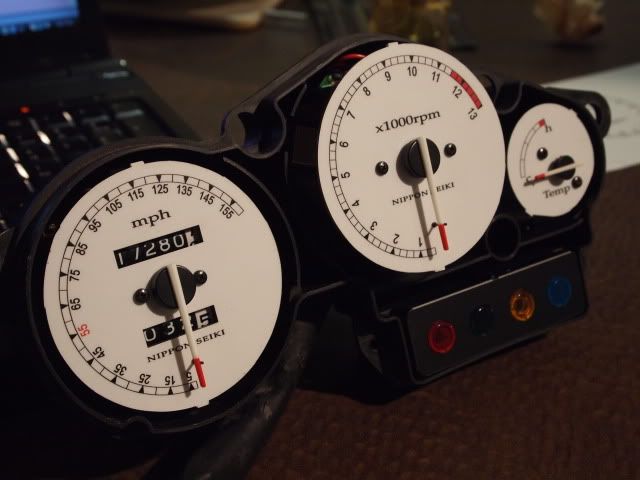
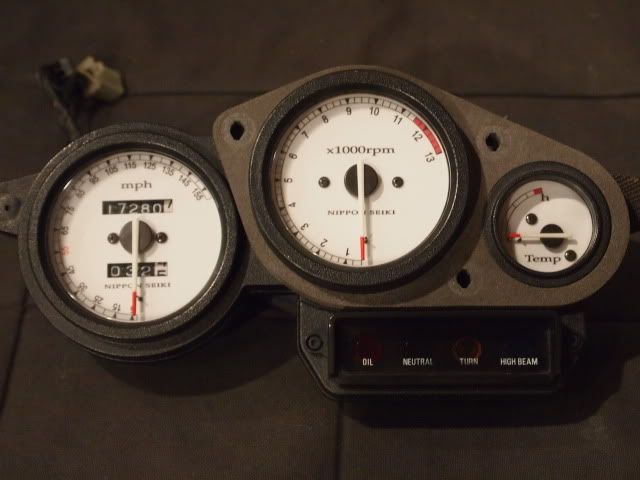
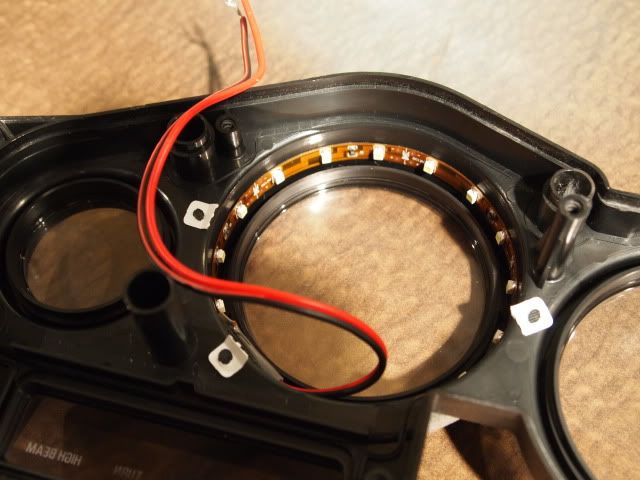
The cluster just has a few screws in the back. Take those out and the whole front fascia comes off.
YG as SquadraCorse said, unbolt some screws and the face will come off.yamaha_george wrote:TGSquadraCorse wrote:I will put together a write up. Unfortunately I didn't take too many pictures at the start but it's all pretty easy, and I can fill the gaps in with some stock internet photos.
the Yamaha gauges I have seen have always been sealed by some kind of waterproof sealant and a flanged over metal rim. are the FZR ones different ?
I must admit that because of this maybe erroneous belief I have not tackled the FZR versions.
Hi,jdugen wrote:Like the look! Add me to the list of interested people.
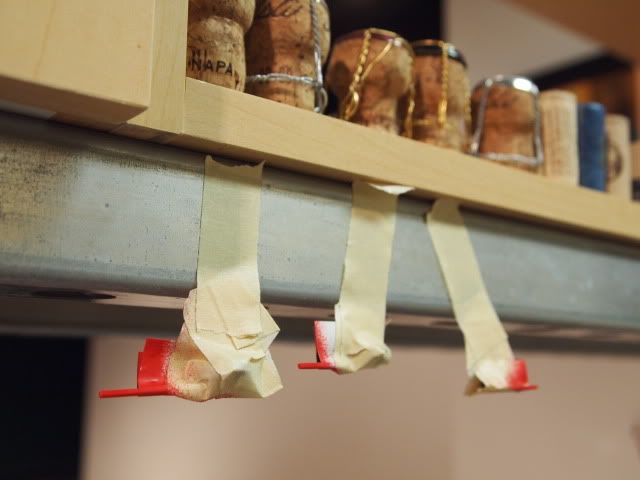
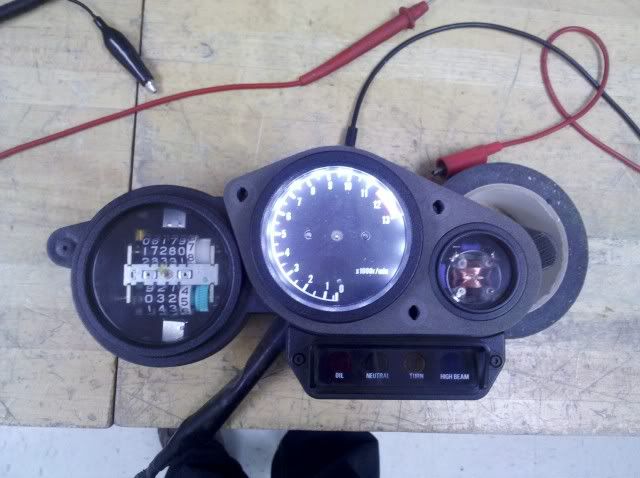
BTW. The stock clock faces are glum at night. I found that the back of the face is sprayed with some semi opaque paint, A dab or three of thinners has it cleaned off and much brighter digits results. BE VERY CAREFUL not to get ANY thinners on the face or you will lose all your numbers!
I had 2 bulbs out on mine when i bought it.Could not get hold of 1.7v bulbs,so changed them all for 3v.Made quite a differance.yamaha_george wrote:Hi,jdugen wrote:Like the look! Add me to the list of interested people.
BTW. The stock clock faces are glum at night. I found that the back of the face is sprayed with some semi opaque paint, A dab or three of thinners has it cleaned off and much brighter digits results. BE VERY CAREFUL not to get ANY thinners on the face or you will lose all your numbers!
Any kind of solvent CAN give problems, the trick I heard was "000" grade steel wool used gently on the rear side made the lights underneath a better chance.
You can also buy LED replacements for bulbs which are a tad brighter too ,without loading the battery / generator down.


RDRCR,racerd14666 wrote:
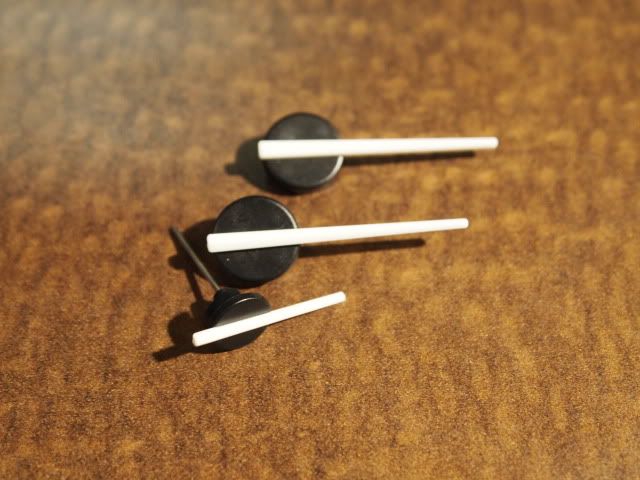
how did you get the needles off with out destroying them, cus i got a few old sets laying around and they all seem to be glues on and i just seem top be bending the arm that there mounted to.
you wouldn't happen to have the template for the gauge faces would you?


