This is a general procedure for replacing the fork seals for an FZR 400 or FZR600. The fork seals for the FZR400s and FZR600s are the same and so are the procedures for replacing them. The FZR 400 and 600 forks are identical in overall length and diameter. The forks for a 600 will fit a 400 and vise versa. The only difference between the 400 and 600 forks is the length of the springs and the collar (spacer under the cap bolt). The 400 has a longer spring and short collar. The 600 has a shorter spring and longer collar.
In general, 88-89 forks have brake caliper mounting bosses that will only accommodate two piston calipers. 90 and up will only take four piston brake calipers. All outer tubes (lower part of the fork) will fit any inner tube (upper part of the fork) in any combination of year or model (FZR400 and FZR600).
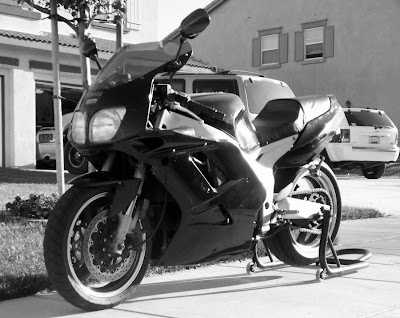
Picture #1

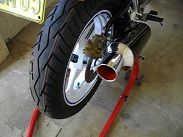
Picture #2

First off, start by raising the front wheel off the ground and make sure the bike is steady with whatever you use. You could use a couple of ratcheting straps and hanging the front of the bike from rafters.
You could also pull the exhaust header and muffler and block up the motorcycle with cement blocks or wood blocks.
I stuck a steel bar under front part of the engine above the exhaust header. Place the bar on the forward side of the oil pan. I had a bar long enough that I could put a jack stand on the high side with the bike on the kickstand. Then I took a floor jack and raised the low end of the bar high enough to slide another jack stand under the bar.
Picture #3

Then loosen the handle bar bolts (in picture #2) and remove the handle bars from the top of the forks. The brake hose for the front brakes was not long enough for me to remove the right handle bar. So I just left it loose so I could pull the fork out of it later.
Remove the brake calipers from the forks. I like to take the dust covers off and remove the brake pads to make removing and assembling them easier.
Remove the speedometer cable shown in picture #1.
Remove the brake hose supports shown in picture #1.
Loosen the axle pinch bolt and remove the axle and wheel. Picture #4
Picture #4

Then remove the four bolts attaching the fork brace and fender. Lower the fender out between the forks. (Picture #1 and #4)
Picture #5

Then all you are left with is bare forks.

Before loosening the clamp bolts take a wrench and loosen the top cap bolts (Picture #2) DO NOT REMOVE THEM YET. Just loosen them. They may be real tight and it is much easier to get them loose with them in the tripple clamps and tightened down.
Finish removing the forks by loosening the top clamp bolts and the bottom clamp bolts and sliding the forks out of the clamps.


With the forks removed you may be able to drain the oil out of them by removing the drain screw on the bottom of them. (Picture #1 and #4) Not all outer fork tubes have drain screws.
If you have drain screws: I like to set a coffee can on the floor, put the bottom end of the fork in it and remove the drain screw. Then remove all the oil by leaning on the fork to compress it. The oil will shoot out of the drain screw when compressing it. Do it as many times as nessecarry to get as much out as possible. Then re-install the drain screws so you don't lose them.
If you don't have drain screws skip the above.
Now remove the top cap bolt. Be careful and MAKE SURE to keep pressure on it with your hand while unscrewing it. If you don't it will shoot off and the spring or cap bolt may get you. Remove the collar and spring. Tip the fork upside down into a coffee can to drain out oil compress and extend the fork a few times to get out as much oil as possible.
I like to lay out the pieces. Lay them out on a clean surface if you don't plan on washing them all up. The cap bolt, collar (spacer), spring seat, and spring.

Next clamp the fork in a vise by the caliper mounting bosses on the outer tubes.
SPECIAL NOTE: Use a heavy rag or professional soft vice jaw covers (a piece of old alloy sheet bent over the jaw face will work as well ) so as not to mar the fork when clamping them in the vise. Photo shown is for reference only!

You will need to make a tool to hold the rebound dampener when loosening the bolt in the very bottom of the fork. You can make one by getting a three foot piece of 5/8 threaded rod and four nuts (Should be able to get at any hardware store). Run two nuts on the end and tighten them together to lock them and do the same on the other end so you can grip it with a wrench. I made one by welding a 5/8 nut to the end of a rod and using a vise grip to hold it.

If you use a bolt with a 5/8 head on it and weld it to a 1/2 square section rod 24" long you can hold the bolt headed tool in the vice. (Thus avoiding holding your precious forks in a vice where accidents have been known to seriously spoil the paint or polish ) Slide the fork inner tube over the bolt head end of the tool until you feel it hit bottom. Now turn it gently until you feel the bolt head engage in the damper rod socket head. Once you have it engaged you can use the allen key as descibed below

Carefully slide the tool into the fork and put an allen wrench into the end of the fork


It may take a lot of force to break the bolt free in the bottom of the fork. Try using a vise grip on the allen wrench or another open-end wrench on it to get it loose. Just make sure to keep the allen wrench seated in the bolt. (Stripping the head of the bolt will make much more work.) Then spin the bolt all the way out of the end of the fork. There is a copper gasket on this bolt so don’t lose it (may be stuck to the outer tube). Then pull out the tool for the dampener.
Next carefully pry the dust cover off of the top of the outer tube with a flat screwdriver using a twisting motion. Be careful not to scratch the inner tube.


Slide the dust cover out of the way and look at the snap ring. Notice there are loops in it. Put your screw driver in one of the loops and pry it away from the outer tube and remove it.

Now to you can remove the inner tube. To do so, slide the inner tube all the way into the outer tube. Now firmly grasp the inner tube and sharply pull on it with medium force. Repeat until the outer tube is free. This is what it will look like when it is apart. When you are pulling out the inner tube you are driving out the bearing in the top of the fork (Bearing #1) from its seat. You will have to drive it back in when re-assembling the fork. (Not difficult)

To clean them up, remove the dampener from the inside of the inner tube (slides out when you tip the top end of the inner tube down), soak all parts in warm water with your favorite soap. Run a green scouring pad through the inner tube and the outer tube. Clean with soap and water and rinse with clean water. Dry parts and re-assemble.
To re-assemble, take the outer tube and put the plastic spacer inside it. To do so take the outer tube, hold it vertically and drop the plastic spacer inside it. Make sure that it is in properly. The dampener end will fit in the plastic spacer when the inner tube is assembled in the outer tube. This end should be up when dropped into the outer tube.


Then slide the dampener into the inner tube and make sure that there is a short spring on it and the pointy end of the dampener is down.

Clamp the outer tube into a vise by the caliper mounting bosses.
Slip the bearing #2 (on the inner tube) into the outer tube.
Then slide the top bearing #1 onto the inner tube and slide all the way till is makes contact with its seat.

Then slide the washer on, take a piece of a wooden dowel, small round punch, or a piece of pipe that will slide over the inner tube and fit inside the large opening of the outer tube. Take a hammer to the wooden dowel or punch and tap around the inner tube to tap the bearing back into the seat. MAKE SURE that the bearing surface is clean. Dirt will make the fork bind and possibly scratch the inner tube.
The bearing should nearly be flush inside.

Make sure the inner tube will slide freely up and down with Bearing #1 seated.
Take the tool for the dampener and slide into the inner tube. Take the dampener bolt and insert it into the bottom of the outer tube. Make sure there is a copper gasket under the head of the bolt. Tighten the bolt to 29 foot pounds.
Leave the washer inside on top of the bearing and slide the new seal onto the inner tube. Lube the inner tube with a little fork oil or lithium grease. Make sure the numbers on the seal are up with the lip, and the side with the spring is down. Take a small wooden dowel or punch and tap the seal into place with a hammer until seated.

Then slide the snap ring on and install. Make sure the you can see the snap ring is seated in the grove
Then slide on the dust cap and tap into place with hammer.
Hold the fork upright and with it fully compressed and no collar or spring installed fill it with fork oil to 3.98 inches from the top of the fork through the cap bolt opening. Be sure to fully extend and compress the fork a few times do distribute the oil. There are many different types of oil people have used. Automatic transmission fluid, engine oil, and different weights of fork oil have been used. Yamaha recommends 10 weight fork oil. It will take about 15 ounces per fork. Yamaha sells fork oil in 16 ounce cans. You will need two cans which costs about $12.
After filling to the proper height, fully extend the fork and insert the spring with the spring seat on the top, and then the collar, and then screw on the cap bolt. It will be hard to get the cap bolt started but take your time.

Slide the forks back up through the clamps on the bike. The top edge of the inner fork tube (not including the cap bolt) should stick out above the top clamp 1.44 inches.
Tighten the top clamp bolt to 19 foot pounds, and the bottom to 16 foot pounds. Then tighten the top cap bolt to 17 foot pounds.
Install the handle bars and tighten bolts to 17 foot pounds. Then slide the fender up in between the forks, place the fork brace on top of the forks and tighten the bolts to 5.1 foot pounds.
Install the front wheel making sure the spacers are in the correct place. Then tighten the axle to 42 foot pounds.
Then install the brake calipers and tighten the bolts to 25 foot pounds.
Then tighten the axle pinch bolt to 14 foot pounds
Re-install the brake hose supports and the speedometer cable
Permission granted to FZROnline.com by BNT83 to post this thread in its entirety.