The Build

FZR600 Forum

Moderators: Site Director, FZR Forum Moderators

User avatar
Nick Howe
50+ Posts
50+ Posts
Posts: 52
Joined: Sun Feb 05, 2012 8:45 pm
Location: San Diego, CA, USA

The Build

Post by Nick Howe »

So, bought this bike, let it sit too long, then sold my gf's bike to pay for her NOS :thumbsup: '92 FZR600RR :headbang:
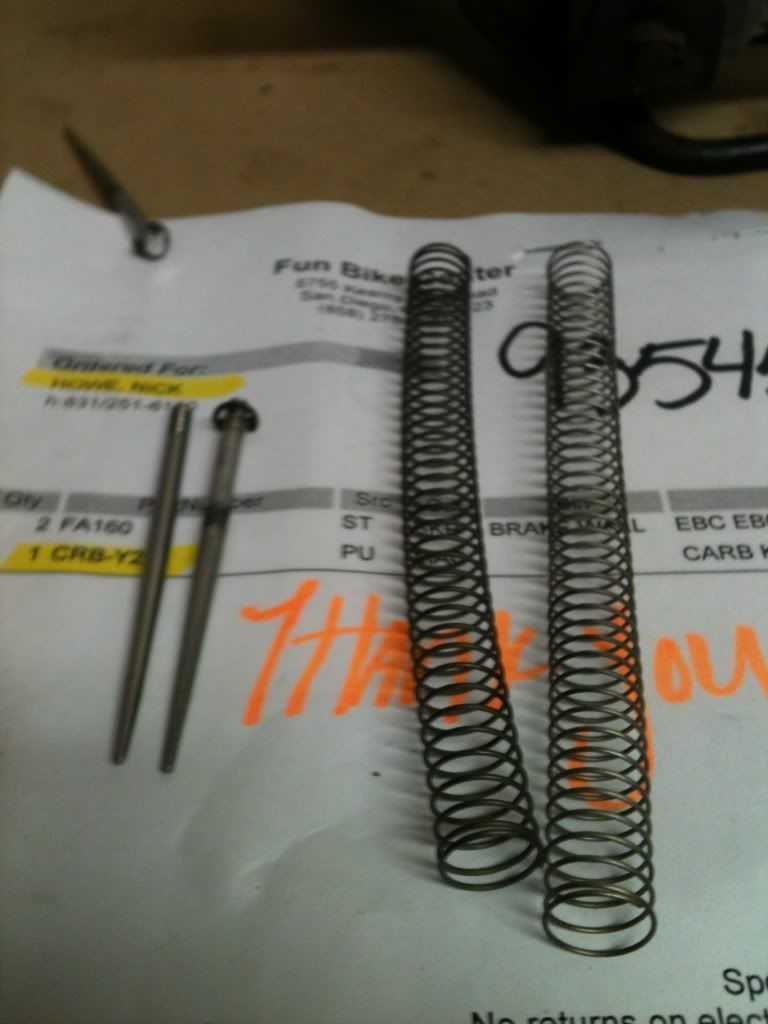
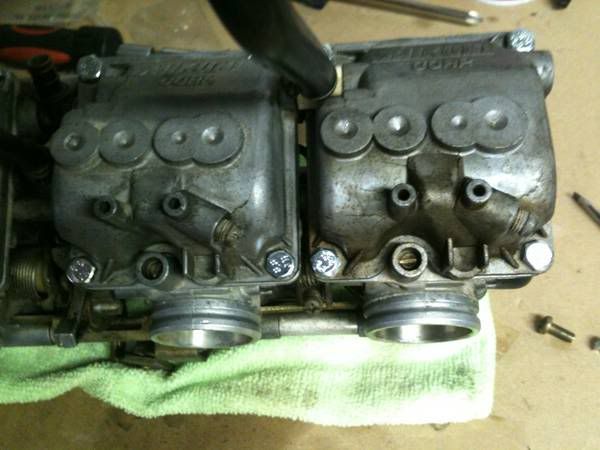
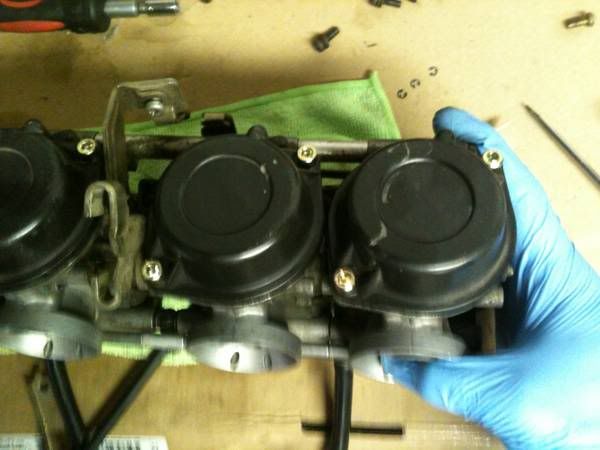
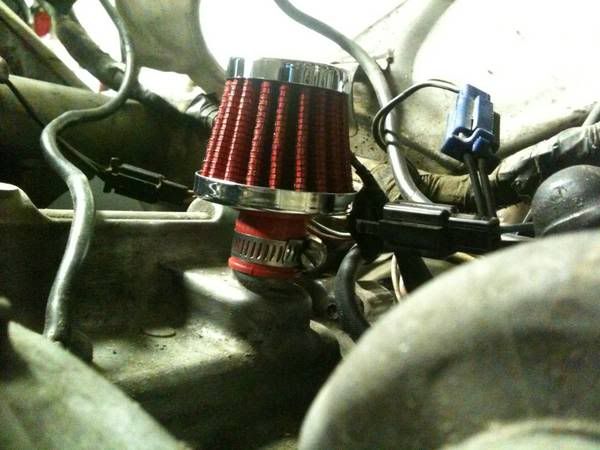
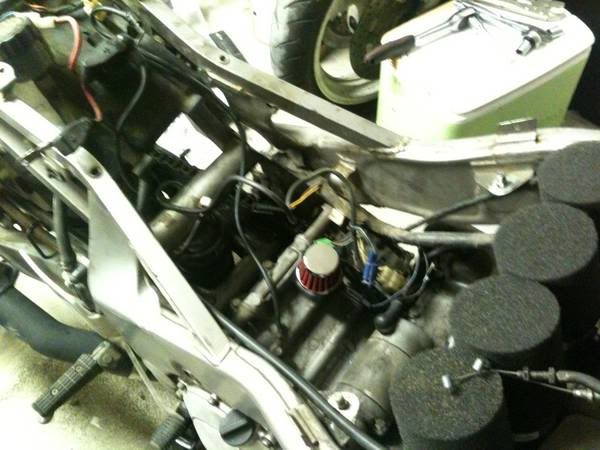
It already had a yosh pipe (which I opened up and it was suprisingly well packed) and an old jet kit but it died below 2k rpms so i re-did the emulsion tubes(and new jets just in case), and it had some old pod filters that were disgusting...
Anyways, been at it as follows over the past week:
New: jetkit, uni air pods, airtech fairings (made in '97!!!), new gas tank, new fuel petcock, new/old clip ons and controls, new lhp windscreen
Here is the bike torn down, lost the orig pics, it was bad, $400 bad
ImageImage
Imagelining up the stock one to see where the airtech needed cuttingImagethe cut airtech pieceImageSO MUCH FIBERGLASS IN MY LUNGS, DANG YOU AIRTECH WITH NO PREDRILLED HOLESImage
also cant tell, but new shinko podium rear 150, doesnt rub, YAY! WOOT

Now she needs suspension cause gawd its shot, suggestions for paint? Im thinking all white or a red/silver paint scheme like the mv agustas...
and how about a headlight where the "ram air" tubes are supposed to go? im thinking no b/c it has the uni indiv. filters so it would actually benefit from some cold air...
Last edited by Nick Howe on Thu Feb 16, 2012 11:31 pm, edited 1 time in total.
There are no small days.
User avatar
cowboi
Level 2.0
Level 2.0
Posts: 226
Joined: Wed Sep 14, 2011 6:35 pm
Location: U.S Georgia

Re: The Build

Post by cowboi »

Looking good so far. Can't wait to see the finished product. :)
When all other contingencies fail, whatever remains, however improbable, must be the truth......S.Holmes

78 CB750A
96 FZR600R
00 YZF R1
04 YZF R6
User avatar
Nick Howe
50+ Posts
50+ Posts
Posts: 52
Joined: Sun Feb 05, 2012 8:45 pm
Location: San Diego, CA, USA

Re: The Build

Post by Nick Howe »

So, as you can see, the airtech nose/front fairing has no holes for the headlight. It also has no bracket for holding the headlight, unlike the OEM, big question is has anyone cut a hole for a smaller headlight? Im not going to be riding this much at night anyways, just want to not get pulled over
Headlight suggestions? I liked what one guy did to his fzr400/600 over on the archives, he just had a small circular headlight right in the middle of the nose.....
(ill try to find the pic of it)
There are no small days.
User avatar
Crying Freeman
50+ Posts
50+ Posts
Posts: 62
Joined: Wed May 04, 2011 2:50 pm
Location: Queens, NY

Re: The Build

Post by Crying Freeman »

You can probably buy vinyl stickers that look like headlights to fool the patrolmen...looking good!
1998 Yamaha FZR 600
User avatar
Nick Howe
50+ Posts
50+ Posts
Posts: 52
Joined: Sun Feb 05, 2012 8:45 pm
Location: San Diego, CA, USA

Re: The Build

Post by Nick Howe »

The fairings just went in for paint today with Camille of http://www.paintbycamille.com/
seen some of her work before and wow, if your in sd, look this girl up!
I'm going with a Ducati red base, with white number plates on the tail and a white face like the 1098r

:thumbsup: and on Sunday I'm picking up a race-tech'd set of forks and a gsxr750 shock with revalved internals from a racer in la. WOOT

Pics will be up on Wednesday by the latest!!!

And perhaps a sticker would work, but I'm way too excited about this paint job!
There are no small days.
User avatar
Nick Howe
50+ Posts
50+ Posts
Posts: 52
Joined: Sun Feb 05, 2012 8:45 pm
Location: San Diego, CA, USA

Re: The Build

Post by Nick Howe »

Picked up forks from a guy in LA, Jason's Pool Service, said he raced in the 600/750 classes with the forks i bought from him. Im 210 and he says they're set up with racetech springs/goldvalves for a 225lb rider, so im thinking itll be better than the crap busted out forks on this b*$natch now. Also got a 750 gixxer shock with the racetec valve he said will fit right up, even threw in another set of stock fzr dogbones.
grand total for parts: 350$ WOOT

and here they are!
ImageGuess he was sponsored by Metzeler, its got an m-3 on there with good tread so :)
Image

anyone know how to tell what year this shock is off? if it bolts right up I feel like it should go on the wiki (if its not already :duh: )
There are no small days.
User avatar
Nick Howe
50+ Posts
50+ Posts
Posts: 52
Joined: Sun Feb 05, 2012 8:45 pm
Location: San Diego, CA, USA

Re: The Build

Post by Nick Howe »

So the shock was not a direct bolt on, the bolt for the 750 shock is 2mm narrower (i think 8 to 6mm)
When I put it in the stock shock attachment on the frame, there was play up and down, so I went to Marshalls (hardware not clothes) and bought some special washers with tubing (idk what to call them) made of steel. Now that its all hooked up, there is no up and down play, but there is a slight left to right wiggle (1mmish)

Also got the forks on, muuuuuch stiffer than the pieces were on there, very straightforward swap, made sure to lube everything up with some blue grease mmmm. The swap was just a complete front end, so now there are no warped brakes yay! :grinnod:

this is the diff btw the bolts for the shock
Image

and this is the mounted shock at the top. Uhm, I thinkI could have the top mount from the fzr shock itself cut off and welded to the gsxr one, or have the fzr diameter tube pressed into the gixxer swap.
Image
and this is how i jacked up the front for the fork swap... prob wasnt great for the subframe :headscratch:
Image
There are no small days.
DonTZ125
Moderator
Posts: 2214
Joined: Tue Dec 02, 2008 11:20 pm
Location: Scarberia, ON
Contact:

Re: The Build

Post by DonTZ125 »

I wouldn't be too worried about the subframe - assuming somewhat even distribution front to rear, you're talking a weight of less than 120lb on each jack face, distributed over an inch+ of rail. Not a particularly significant load.
User avatar
Nick Howe
50+ Posts
50+ Posts
Posts: 52
Joined: Sun Feb 05, 2012 8:45 pm
Location: San Diego, CA, USA

Re: The Build

Post by Nick Howe »

So I just put in the stage 3 Factory Pro Jet kit, the springs felt much stiffer than the previous ones,
but when i opened the carbs again, i noticed that the factory plugs had been drilled on the fuel/air mix I found they were 2.5 turns out
the needles appeared to be dynojet, and the clip was at 3/6. I put in the factory pros at 2/5.
Big thing I was wondering about, the mains were 118s and I put in the Factory Pro 110s. This will make the bike leaner, but I think the bike has been running rich so maybe the P.O. was higher up? :headscratch:
Anyways, didnt put it back together b/c the old screws are soft as butter and I have to run to the parts store to get some more of those lil buggers
Factory Pro on left, Dynojet(maybe?) on the right
Image

And then this is the shock linkage that I really want some feedback on
Image
There are no small days.
User avatar
Nick Howe
50+ Posts
50+ Posts
Posts: 52
Joined: Sun Feb 05, 2012 8:45 pm
Location: San Diego, CA, USA

Re: The Build

Post by Nick Howe »

Today went and got the new screws for the carbs, went with hex head b/c of the issue of butteryness on the phillips heads
Image

Also the factory pro screws look... professional lol
Image

And put on this super neat-o filter on the engine oil overflow hole, which was previously a tube leading to the non-existant air box
Image
Image
There are no small days.
User avatar
Nick Howe
50+ Posts
50+ Posts
Posts: 52
Joined: Sun Feb 05, 2012 8:45 pm
Location: San Diego, CA, USA

Re: The Build

Post by Nick Howe »

I am looking into doing this mod with some radiator tubing or perhaps some kitchen tubing from the wonderful land of HomeDepot
I am not privileged to have an extra airbox laying around anymore and my bike is sitting with uni pods, so i would love to have a simple fix of these stacks
the bike is non-exup, and seemed to be well set up (K&N pods, 118mains 2.5 out Dynojet kit needle 3/6, yosh slip on) by the p.o. :cheers:
before he let it be lein-sold :yuck:
THE QUESTIONs:
How thick are the inside diameters of the stock airbox stacks?
How tall are they? And would they benefit from being staggered like on the modern velocity stacks (taller insides and slightly shorter outsides)

If someone can get me those two dimensions, Ill have a set or three made up for testing (out of various materials and of different lengths) by the end of the week.
There are no small days.
User avatar
Nick Howe
50+ Posts
50+ Posts
Posts: 52
Joined: Sun Feb 05, 2012 8:45 pm
Location: San Diego, CA, USA

Re: The Build

Post by Nick Howe »

Fiiiinally got the fairings back and they look pretty damn sweeet if i do say so myself, pics really dont do it justice. there is gold striping in between the red and white
ImageImageImage

Also finished up the air filter/air stacks
they are just 2" rubber boots meant for plumbing with uni pod filter element cut into the top fitting
ImageImageImage

what yall think?!
There are no small days.
DonTZ125
Moderator
Posts: 2214
Joined: Tue Dec 02, 2008 11:20 pm
Location: Scarberia, ON
Contact:

Re: The Build

Post by DonTZ125 »

That bodywork is gorgeous!

I'm a little concerned about the intakes, though. The filter surface area is typically much larger than the throat area, to allow for the resistance to flow of the filter element. I think you'll find what you have there will be rather restrictive, with loss of air flow and resulting misjetting causing power loss and plug fouling.
User avatar
Nick Howe
50+ Posts
50+ Posts
Posts: 52
Joined: Sun Feb 05, 2012 8:45 pm
Location: San Diego, CA, USA

Re: The Build

Post by Nick Howe »

Do you think less foam would fix this? Like a wire mesh and a thinner filter substance?
I'm also thinking an oval air filter like you would see on a double/triple carburated car, like this http://www.rjays.com/Billet_Spec/billet ... 420-lg.jpg
Last edited by Nick Howe on Wed Feb 29, 2012 9:00 pm, edited 1 time in total.
There are no small days.
DonTZ125
Moderator
Posts: 2214
Joined: Tue Dec 02, 2008 11:20 pm
Location: Scarberia, ON
Contact:

Re: The Build

Post by DonTZ125 »

No, I think MORE foam would fix this - look at a Uni filter pod; they're typically 2-3 diameters in height. Your set-up is less that a fifth!

Imagine the red foam you have there on the end is the top of a Uni filter pod. What you've effectively done is to stuff that filter down into the mounting rubber such that only the top 1/4" or so is peeking out. How well do you think that filter is going to flow air?
Post Reply