FZR Winter Tinkering
Moderators: Site Director, FZR Forum Moderators
-
Gizzard1533
- Level 2.0

- Posts: 220
- Joined: Sun Sep 11, 2011 12:44 pm
- Location: Cambridgeshire
Re: FZR Winter Tinkering
Works been slow over the past few days, with new years and recovering from food poisoning but i recieved a text saying that mega had revieved my swingarm and the brace should be with him end of the week. so hopefully that'll be done 2 weeks at the latest. whilst thats being done i intend to strip the front forks and wheels to get them ready for powder, gonna test fit the swinger before sending that off to make sure everythings all good with that. then its full steam ahead.
-
Gizzard1533
- Level 2.0

- Posts: 220
- Joined: Sun Sep 11, 2011 12:44 pm
- Location: Cambridgeshire
Re: FZR Winter Tinkering
Right lets get this thread back on track.
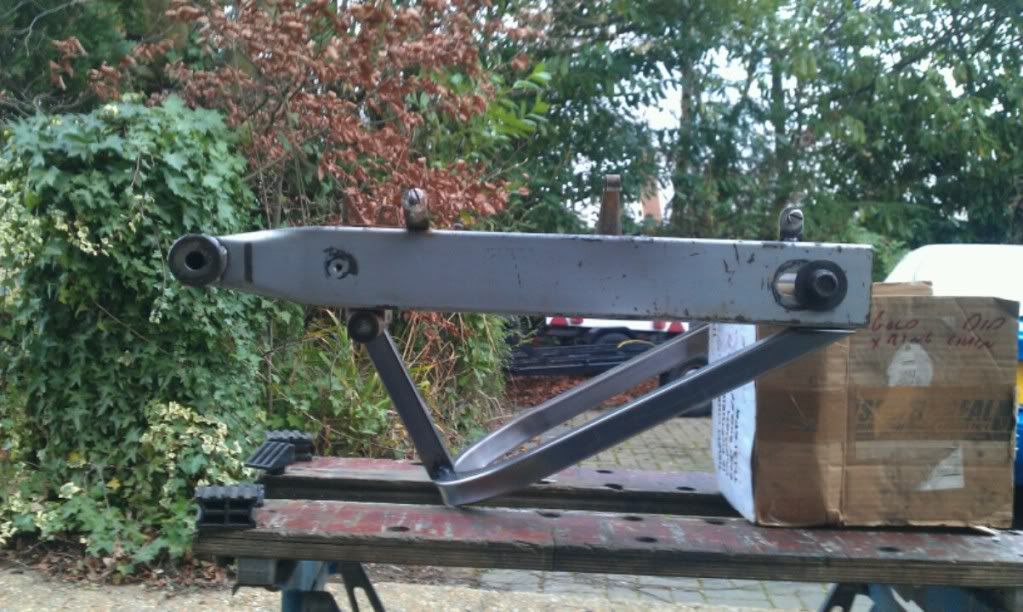
Just after the new year i sent megawatt my swinger to be braced and today he sent me a picture of the progress so far, its almost done just gotta get it all welded up and the bobbin fitment holes.
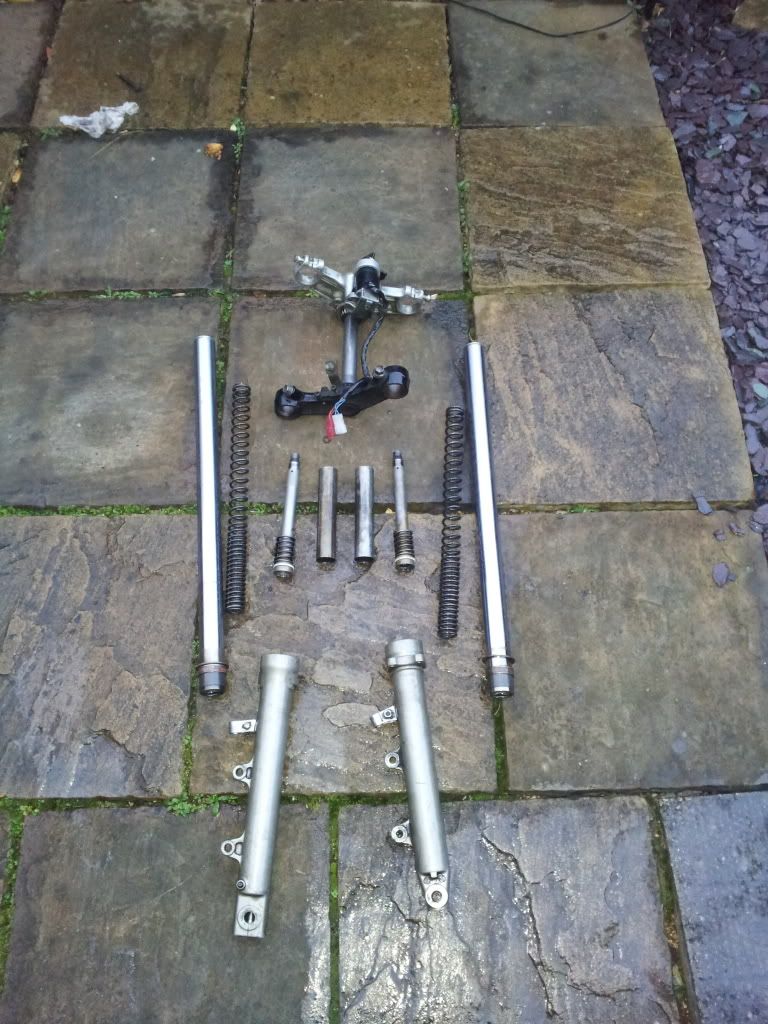
With news off this, I set to work on the bike again and managed to get the forks stripped entirely (note to self - must buy something to make the job easier!!!).
Tomorrow shall see me ringing around different places to get the cheapeast quote for powder coating. Other than these two things there aint really much to report on.
Just after the new year i sent megawatt my swinger to be braced and today he sent me a picture of the progress so far, its almost done just gotta get it all welded up and the bobbin fitment holes.

With news off this, I set to work on the bike again and managed to get the forks stripped entirely (note to self - must buy something to make the job easier!!!).

Tomorrow shall see me ringing around different places to get the cheapeast quote for powder coating. Other than these two things there aint really much to report on.
- racerd14666
- 100+ Posts

- Posts: 126
- Joined: Sat Oct 30, 2010 3:38 pm
- Location: Albany, NY
Re: FZR Winter Tinkering
whos the cutie?reelrazor wrote:Nice on the color combo...
Sounds very much like mine.
Mine is late 90's Cadillac Pearl white metallic. Black frame, swinger, wheels fork legs.
The only color is the Ohlins yellow spring on the R6 shock and the (not in picture) blue dot R6 calipers.
"YAMAHA" under the front lights, the tuning forks above the tailight. people ask me if it's european on a regular basis.
Yamaha Certified Technician
But i also work on Ducati's Bmw's Moto Guzzi's and Mv Agusta's Ect.
But i also work on Ducati's Bmw's Moto Guzzi's and Mv Agusta's Ect.
-
Gizzard1533
- Level 2.0

- Posts: 220
- Joined: Sun Sep 11, 2011 12:44 pm
- Location: Cambridgeshire
Re: FZR Winter Tinkering
Wow fook me its been over a month since i've updated on anything!!! So what have i got one with, I've rebuilt my engine, after snapping one camshaft, i managed to get the spare one from my old man. I got the engine rebuilt and it now rotates freely, the old man is coming over on friday to help me do my valve clearances, he's also taking me to our local bike shop to get the tyres of my wheels and put onto his ( giving him my tyres for free, aint i a good son  ). Once there removed were then off to the fentec powdercoating to drop off everything to be powder coated (thats, frame, swingarm, wheels and fork legs). In spirit of getting this done, I decided I would paint my engine covers and a selection of other stuff that needed doing.
To get the best finish i could achieve, the first thing i done to everything was give the a bloody good rub down with 600 grit wet and dry, this was to remove and loose paint and give it a good keyed surface for the paint to stick. Once finished rubbing down all the covers looked like this one...
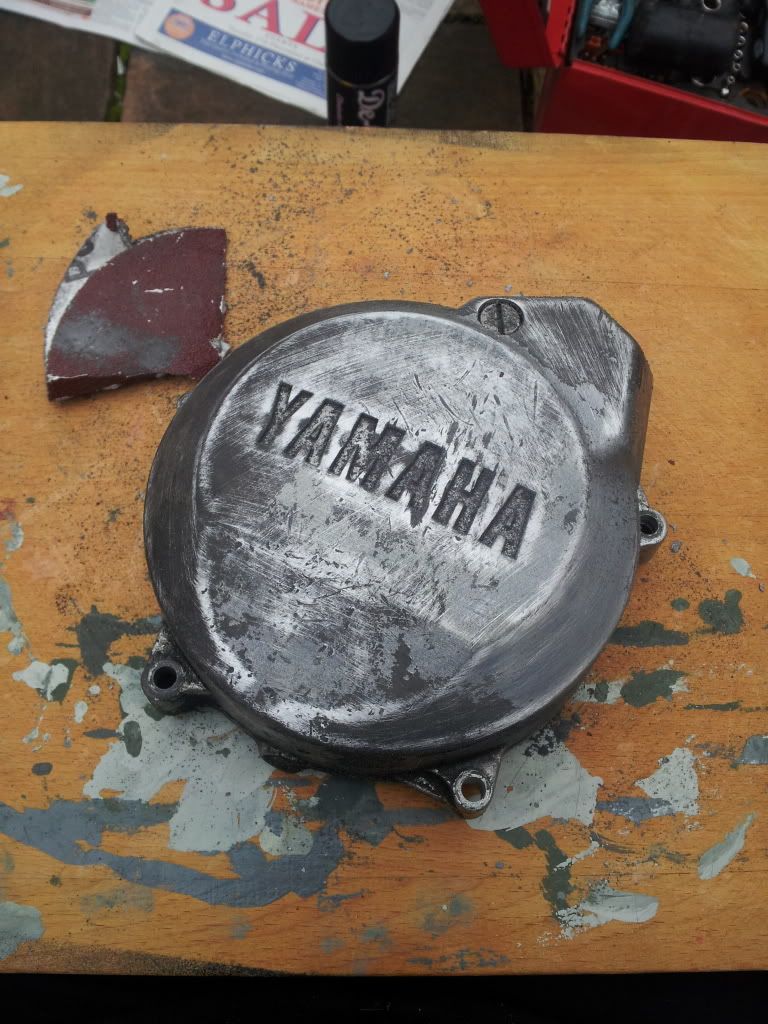
I went one step further with the generator cover and removed the stator from the inside. This made it easier to spray the cover and it laid flat on the floor.
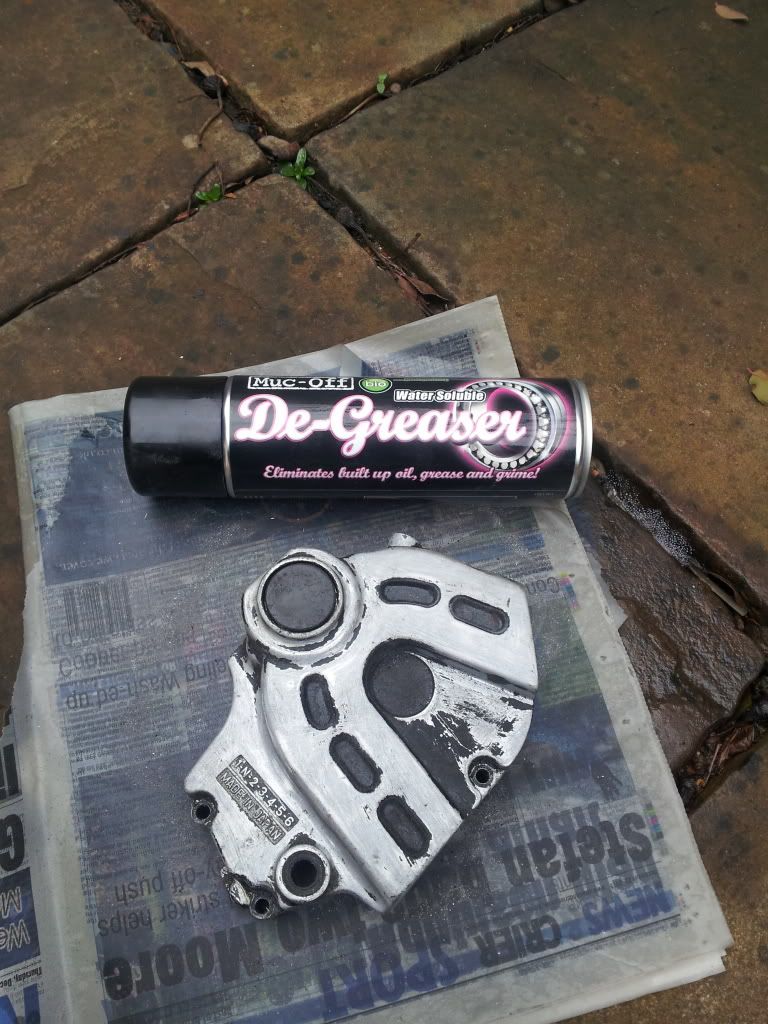
After rubbing the covers down, due to all the dust and my grubby hands being over them i gave them a good clean with degreaser this would also help to achieve a good finish.
Further preporation led me to masking off the holes within in covers, i didn't have any masking tape so i used electrical tape, it done the same job.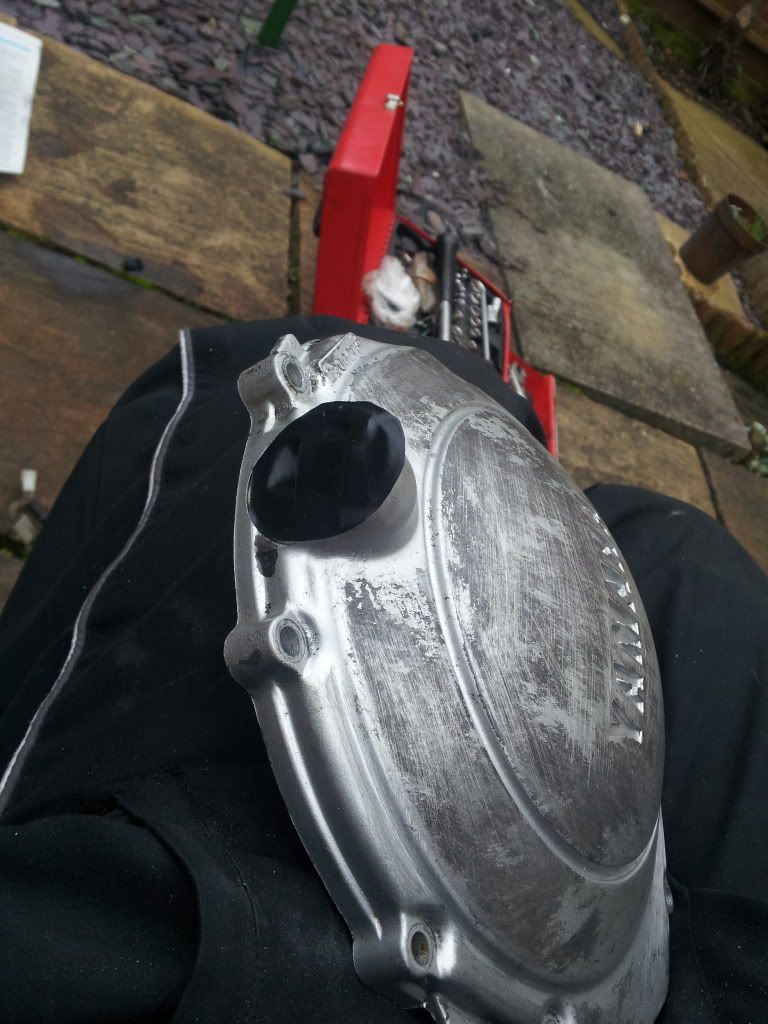
With everything rubbed down, degreased and masked up i set about spraying, i gave each cover atleast 4 coats leaving half an hour between coats. I sprayed all the covers satin black, i used woodburner paint, this will give them a high enough temperature resistance so they dont turn white when the engine heats up :thumbsu:. At the end of it all the covers ended up like this, i also sprayed my rear sprocket, brake torque arm and hanger, and finally the side stand.
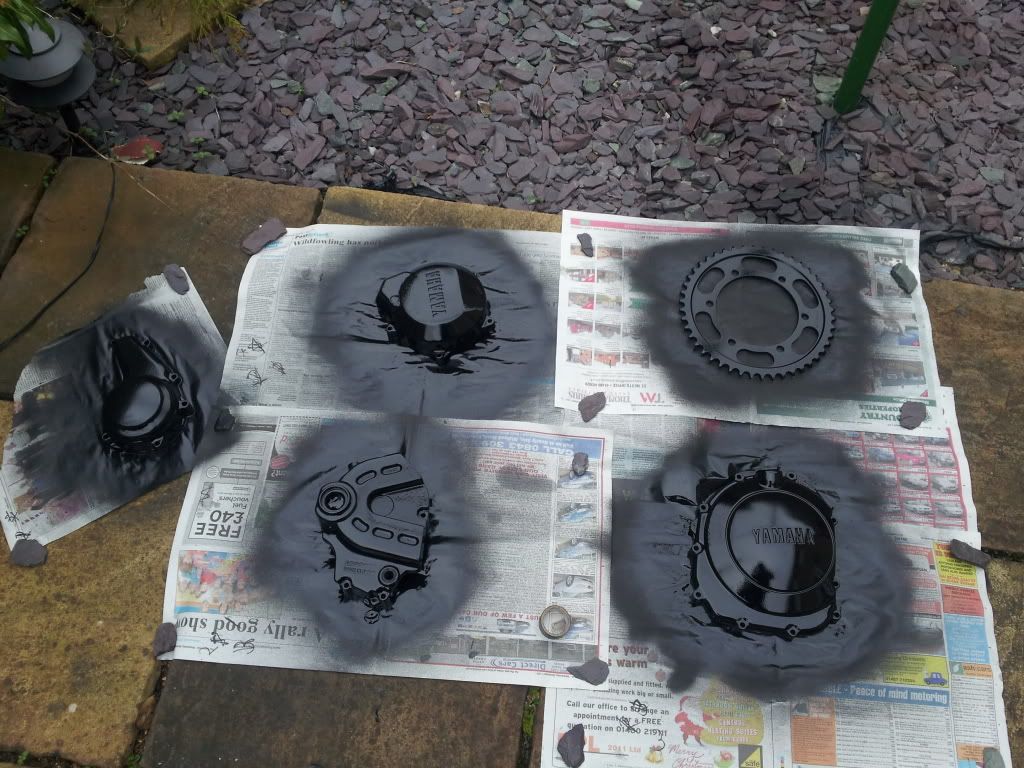
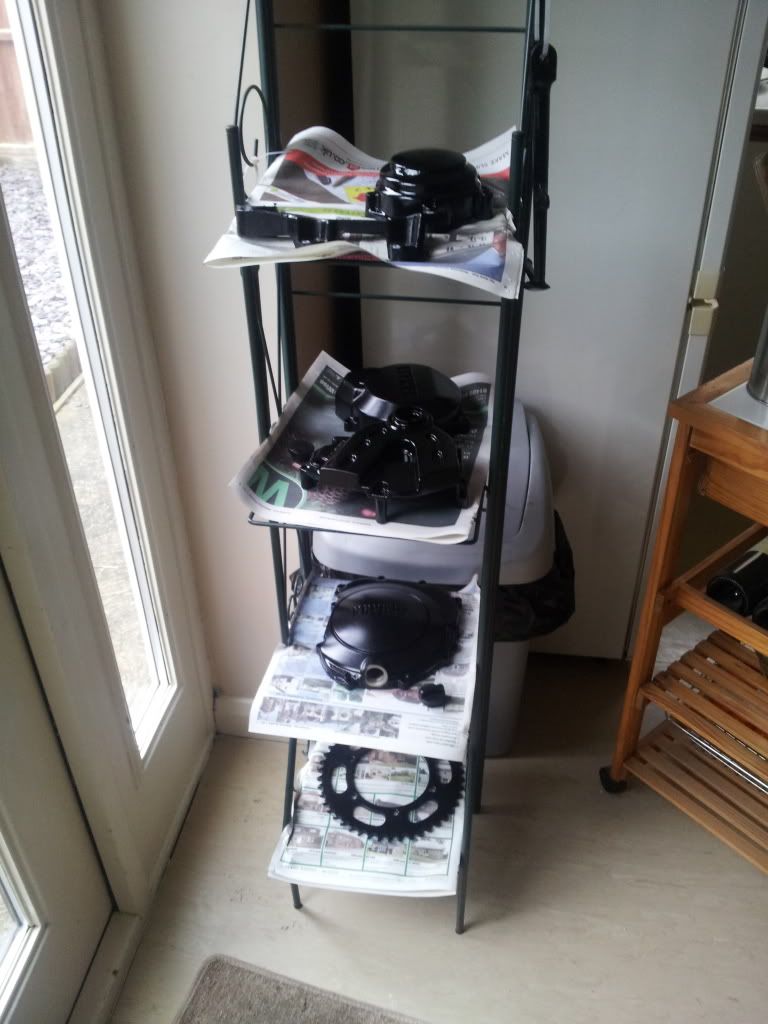
All the covers and others bits are now in my house drying, should be all good by tomorrow


Thats it for now, shall post more on friday
To get the best finish i could achieve, the first thing i done to everything was give the a bloody good rub down with 600 grit wet and dry, this was to remove and loose paint and give it a good keyed surface for the paint to stick. Once finished rubbing down all the covers looked like this one...

I went one step further with the generator cover and removed the stator from the inside. This made it easier to spray the cover and it laid flat on the floor.
After rubbing the covers down, due to all the dust and my grubby hands being over them i gave them a good clean with degreaser this would also help to achieve a good finish.

Further preporation led me to masking off the holes within in covers, i didn't have any masking tape so i used electrical tape, it done the same job.

With everything rubbed down, degreased and masked up i set about spraying, i gave each cover atleast 4 coats leaving half an hour between coats. I sprayed all the covers satin black, i used woodburner paint, this will give them a high enough temperature resistance so they dont turn white when the engine heats up :thumbsu:. At the end of it all the covers ended up like this, i also sprayed my rear sprocket, brake torque arm and hanger, and finally the side stand.

All the covers and others bits are now in my house drying, should be all good by tomorrow

Thats it for now, shall post more on friday
-
Gizzard1533
- Level 2.0

- Posts: 220
- Joined: Sun Sep 11, 2011 12:44 pm
- Location: Cambridgeshire
Re: FZR Winter Tinkering
So this morning i went and picked up the bits from the powder coaters and I must say im happy with the results, if anyone is lookin to have powder coating done around cambridge/peterborough area I couldn't recommend these guys enough, their called fentec powdercoaters and are in peterborough. I got everything you see in the picture done for 160 quid and the turn around time was just over a week.
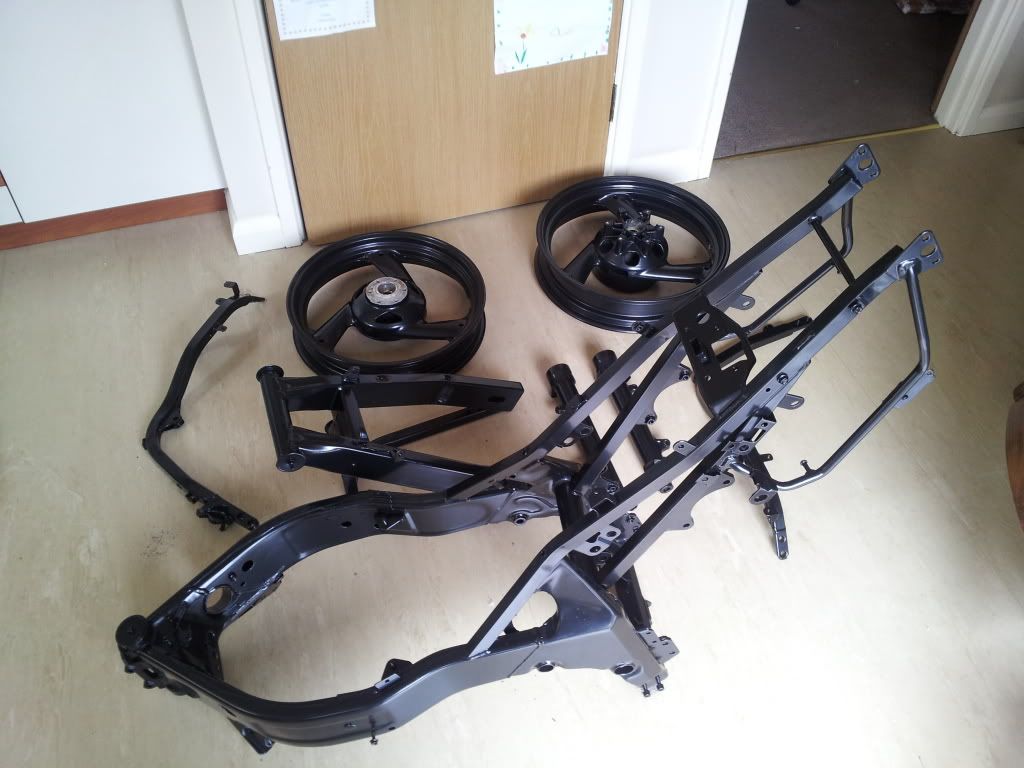
Well i got them home and had a quick hour before work to start putting the bike together and have managed to get it looking like this
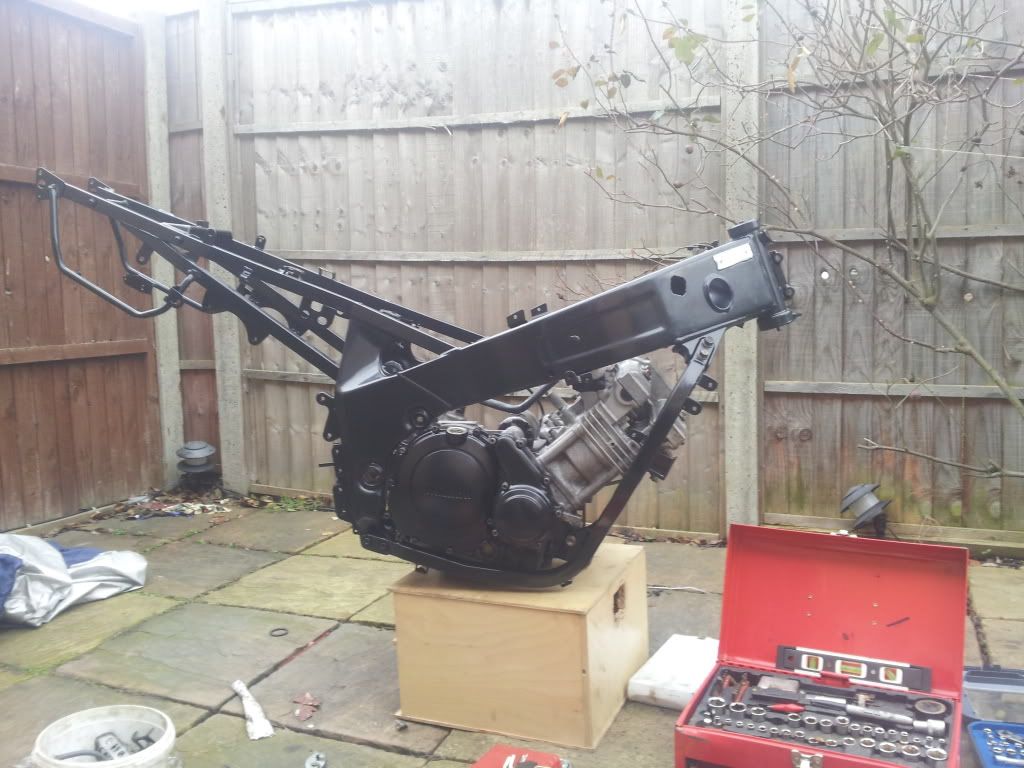
Fitting the engine was a doddle, i put it on the little wooden box and then simply placed the frame over the top. Hopefully get a few hours on it on monday, would like to have it a rolling chassis by then


Well i got them home and had a quick hour before work to start putting the bike together and have managed to get it looking like this

Fitting the engine was a doddle, i put it on the little wooden box and then simply placed the frame over the top. Hopefully get a few hours on it on monday, would like to have it a rolling chassis by then
Re: FZR Winter Tinkering
hi im just doing the final completoin of a fzr 600 restotation from the wheel bearings upwards.i advise you make a wooden stand for the engine around 4 inches above normal level,put the engine with carbs atached on it and lower the newly powder coated frame on to it and bolt the engine in.next put the wiring loom in ,then forks ,then swing arm and rear wheel.then front wheel,be carfull as the front end will be heavy and off balance the rear.this done lift the rear of the bike off the wooden stand "with assistance" and place on the ground.the rest is just adding the other bits... 
-
Gizzard1533
- Level 2.0

- Posts: 220
- Joined: Sun Sep 11, 2011 12:44 pm
- Location: Cambridgeshire
Re: FZR Winter Tinkering
Hi cheers for the tips, as for when the front and rear ends go in i shall be using paddock stands so the wooden box its on now will become surplus to requirements. the exhaust headers will not be added until the bike is off the box, i done this but in reverse order when stripping the bike so everything should go smoothly to planbokka wrote:hi im just doing the final completoin of a fzr 600 restotation from the wheel bearings upwards.i advise you make a wooden stand for the engine around 4 inches above normal level,put the engine with carbs atached on it and lower the newly powder coated frame on to it and bolt the engine in.next put the wiring loom in ,then forks ,then swing arm and rear wheel.then front wheel,be carfull as the front end will be heavy and off balance the rear.this done lift the rear of the bike off the wooden stand "with assistance" and place on the ground.the rest is just adding the other bits...
Re: FZR Winter Tinkering
hi i look forward to the finished pics,i will post some of my finished article soon...
Re: FZR Winter Tinkering
that's actually two different ones.racerd14666 wrote:
whos the cutie?
You know, there's seven days in a week...ONE? ou gotta be kiddin' me.
http://www.michiganmobileservice.com/

“A common mistake that people make when trying to design something completely foolproof is to underestimate the ingenuity of complete fools.”-Douglas Adams
http://www.youtube.com/user/reelrazor
“A common mistake that people make when trying to design something completely foolproof is to underestimate the ingenuity of complete fools.”-Douglas Adams
http://www.youtube.com/user/reelrazor
-
Gizzard1533
- Level 2.0

- Posts: 220
- Joined: Sun Sep 11, 2011 12:44 pm
- Location: Cambridgeshire
Re: FZR Winter Tinkering
Have had all day on the bike today and got a considerable amount done, i managed to get the cooling system fitted, all the electricals, wiring loom, footpegs, and rear brake MC, and finally the fork legs.
Whilst I was fitting the wiring loom i took the chance to properly wire in the adaptor plug for the R6 Regulator/Rectifier. I tried to solder the wires together to start with but due to the shear size difference between the two wires they where and such a pig to get a good connection between the two, so i bit the bullet and brought a 6 pin connector block, this made my life so much easier and it looks a hell of a lot better. As the R6 R/R has to earthed out seperately and the old earth still needed to be used, i decided to join the two earths together and added a little extra wire to make it easier to earth out (i also done this because both the earths didn't reach to the same point.)
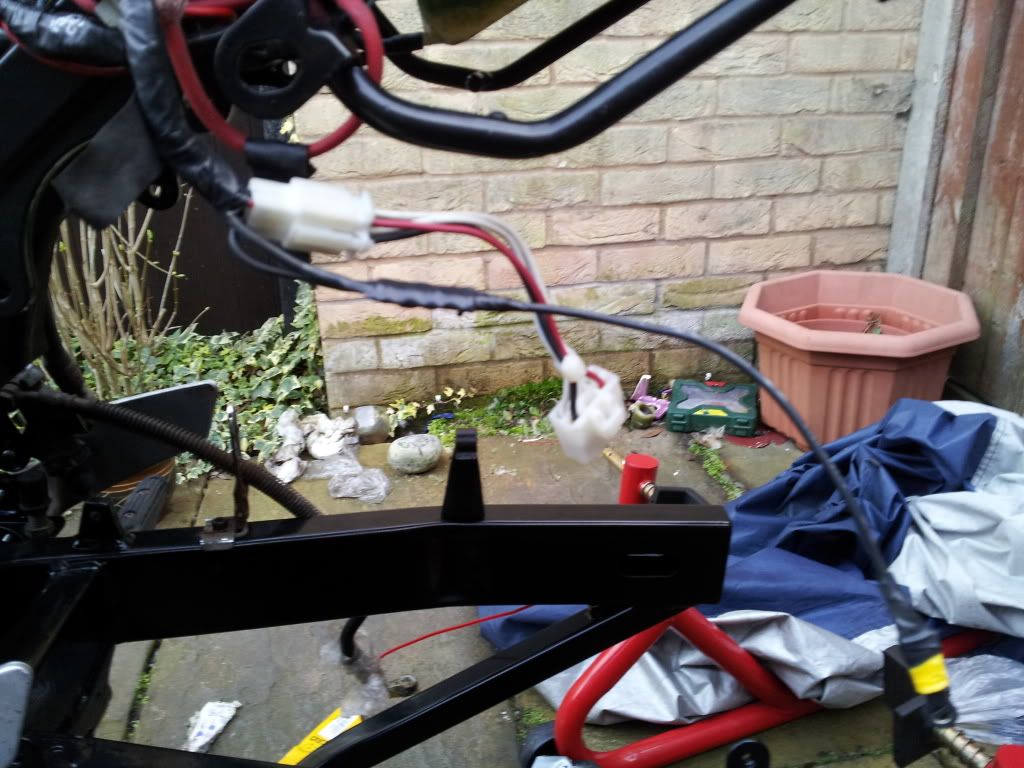
I didn't really take that many pictures i just remembered to get the end of day result, good days work i think...
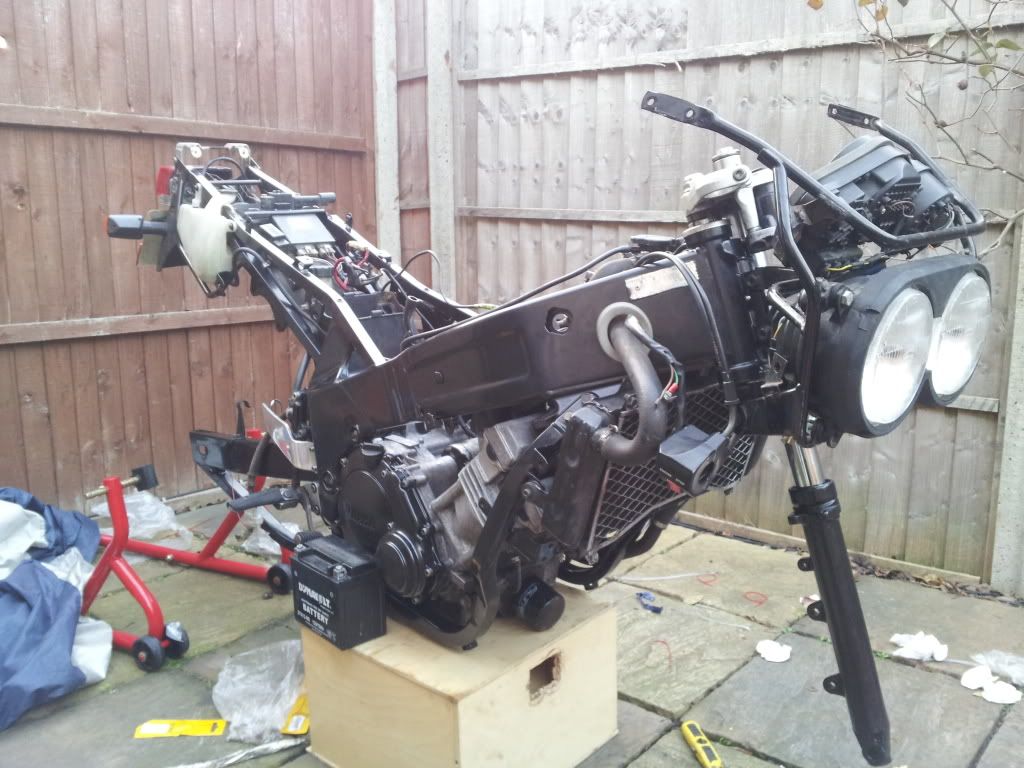
The other fork leg isn't quite ready yet, and the inner bush that sits underneath the fork oil seal decided that it got twisted somewhere along the line and didn't want to sit properly, so i've got another one on its way and hope to get the fitted asap. This will then let me get the front supported by the paddock stand. Next thing is tyres and the new R6 R/R.
Whilst I was fitting the wiring loom i took the chance to properly wire in the adaptor plug for the R6 Regulator/Rectifier. I tried to solder the wires together to start with but due to the shear size difference between the two wires they where and such a pig to get a good connection between the two, so i bit the bullet and brought a 6 pin connector block, this made my life so much easier and it looks a hell of a lot better. As the R6 R/R has to earthed out seperately and the old earth still needed to be used, i decided to join the two earths together and added a little extra wire to make it easier to earth out (i also done this because both the earths didn't reach to the same point.)

I didn't really take that many pictures i just remembered to get the end of day result, good days work i think...

The other fork leg isn't quite ready yet, and the inner bush that sits underneath the fork oil seal decided that it got twisted somewhere along the line and didn't want to sit properly, so i've got another one on its way and hope to get the fitted asap. This will then let me get the front supported by the paddock stand. Next thing is tyres and the new R6 R/R.
-
SouthendChris
- Level 2.0

- Posts: 224
- Joined: Sat Oct 15, 2011 2:14 pm
- Location: Essex, UK
Re: FZR Winter Tinkering
Great progress mate, looking really good now. It's going to be virtually showroom fresh once it's done. I can only hope mine looks half as good when I am able to start!
Chris
Chris
1990 3LN3 FZR250 - back in safe hands 
https://farm6.staticflickr.com/5782/227 ... 41e9_b.jpg
1994 3HE FZR600 - R.I.P. 10/01/12
3x RG80 Gamma
https://farm6.staticflickr.com/5782/227 ... 41e9_b.jpg
1994 3HE FZR600 - R.I.P. 10/01/12
3x RG80 Gamma
Re: FZR Winter Tinkering
hi what make and size tyres are ya going for...cheers bokka..
-
Gizzard1533
- Level 2.0

- Posts: 220
- Joined: Sun Sep 11, 2011 12:44 pm
- Location: Cambridgeshire
Re: FZR Winter Tinkering
I've gone for Bridgestone BT014's, 110/70VR17 for the front and a 150/60VR18 for the rear there the same as what i was running before i took it off the road just i was using Bridgestone BT010's, i dont normally like bridgestones but they're the best option i've got.bokka wrote:hi what make and size tyres are ya going for...cheers bokka..
- Nunya_Binnez
- 50+ Posts

- Posts: 67
- Joined: Wed Nov 16, 2011 11:54 am
- Location: Lawrenceburg, KY, USA
Re: FZR Winter Tinkering
Not a fan of the Avon Storm Ultra 2 or is it an availability issue?Gizzard1533 wrote:I've gone for Bridgestone BT014's, 110/70VR17 for the front and a 150/60VR18 for the rear there the same as what i was running before i took it off the road just i was using Bridgestone BT010's, i dont normally like bridgestones but they're the best option i've got.
NDB
1993 FZR600 (Currently doing a frame-off buildup)
Nunya's '93 Resto-mod Build [TMI?]
"When life gives you lemons...you probably just FOUND lemons." - Bo Burnham
Nunya's '93 Resto-mod Build [TMI?]
"When life gives you lemons...you probably just FOUND lemons." - Bo Burnham
-
Gizzard1533
- Level 2.0

- Posts: 220
- Joined: Sun Sep 11, 2011 12:44 pm
- Location: Cambridgeshire
Re: FZR Winter Tinkering
My supplier didn't stock them, i paid 180 quid for my tyres which is the cheapest i've seen them around. I never used avons so cant put a judgement on them. Are the available in the UK?Nunya_Binnez wrote:Not a fan of the Avon Storm Ultra 2 or is it an availability issue?Gizzard1533 wrote:I've gone for Bridgestone BT014's, 110/70VR17 for the front and a 150/60VR18 for the rear there the same as what i was running before i took it off the road just i was using Bridgestone BT010's, i dont normally like bridgestones but they're the best option i've got.
NDB
