660 build
Moderators: Site Director, FZR Forum Moderators

660 build
So I have started my build today. Didn't get a lot accomplished due to time. But I did manage to get fairings, radiator, carbs, cams removed. Do I need to remove the engine to pull the head and jugs?
92 fzr600.
Full V&H exhaust
R6 VR

Full V&H exhaust
R6 VR


Re: 660 build
No, you don"t need to.
The real question should be: "why wouldn't you? "
It's literally 15 minutes more work past what you have done.
Will save that repeatedly in ease of access through the project
The real question should be: "why wouldn't you? "
It's literally 15 minutes more work past what you have done.
Will save that repeatedly in ease of access through the project
http://www.michiganmobileservice.com/

“A common mistake that people make when trying to design something completely foolproof is to underestimate the ingenuity of complete fools.”-Douglas Adams
http://www.youtube.com/user/reelrazor
“A common mistake that people make when trying to design something completely foolproof is to underestimate the ingenuity of complete fools.”-Douglas Adams
http://www.youtube.com/user/reelrazor
Re: 660 build
So I need some help again. Seems that the timing chain shortened up  . It's so tight but I can't see why? Any ideas? I can get it on the ex cam but it seems impossible to get it on the intake cam. It's not the tensioner bc it's not even in
92 fzr600.
Full V&H exhaust
R6 VR
Full V&H exhaust
R6 VR
Re: 660 build
yeah, it got slack and now has a loop of chain hanging below the crank. It's meshing fore and aft, the bottom has excess links on the crank sprocket.
cams out, and fore and aft nylon guides out, let the chain slack in the valley (keep a index and pinky finger on it) until it is not touching the crank. Spread your finger so the only the front run of the chain contracts the crank sprocket. Use your other hand to roll the crank (forward rotation) and let the chain play onto the sprocket. It should now be running properly.
cams out, and fore and aft nylon guides out, let the chain slack in the valley (keep a index and pinky finger on it) until it is not touching the crank. Spread your finger so the only the front run of the chain contracts the crank sprocket. Use your other hand to roll the crank (forward rotation) and let the chain play onto the sprocket. It should now be running properly.
http://www.michiganmobileservice.com/
“A common mistake that people make when trying to design something completely foolproof is to underestimate the ingenuity of complete fools.”-Douglas Adams
http://www.youtube.com/user/reelrazor
“A common mistake that people make when trying to design something completely foolproof is to underestimate the ingenuity of complete fools.”-Douglas Adams
http://www.youtube.com/user/reelrazor
Re: 660 build
Thanks RR that definitely helped. Still seemed a little tight but I had enough room to get both cams in and tightened down. Just need to finish putting everything back together and fire her up. Can't wait to feel the results. Wish I would've waited til winter bc these last few weeks have been awesome and my bike is torn down. Oh well ill have winter to work on her if anything goes wrong. Thanks for the help again.
92 fzr600.
Full V&H exhaust
R6 VR
Full V&H exhaust
R6 VR
Re: 660 build
So I got it started and let it run until it warmed up. Seems that I have a ticking sound now. Would that be bc of the reg low grade gas?
92 fzr600.
Full V&H exhaust
R6 VR
Full V&H exhaust
R6 VR
Re: 660 build
Nevermind. Blew it up. Don't know what went wrong but ill tear it down and find out I guess. Riding is over til next year. Hopefully done by then.
92 fzr600.
Full V&H exhaust
R6 VR
Full V&H exhaust
R6 VR
-
Kevadlilleke

- 100+ Posts

- Posts: 113
- Joined: Mon Sep 03, 2012 3:38 pm
- Location: Estonia
Re: 660 build
No point in rushing engine jobs because of that "one last ride this season", may well turn out not quite the way you wanted it to...
As one artist once sang: "It didn't turn out the way you wanted it to, did it?" http://www.youtube.com/watch?v=KeMRokXH2rg
As one artist once sang: "It didn't turn out the way you wanted it to, did it?" http://www.youtube.com/watch?v=KeMRokXH2rg
1990 FZR 1000, 1993 engine, terrible state... but improving.
[Project thread] The Yellow FZR - 1990/1993 FZR1000
2012
 2013
2013 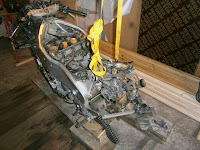 2014
2014 
[Project thread] The Yellow FZR - 1990/1993 FZR1000
2012
2013 2014 Re: 660 build
So after inspection of what happened it looks like I didn't get number 3 connecting rod tight. Bottom of the rod is done for. The bolt is bent and won't come out. So I recovered both bolts nuts and 1 beating. I did find shavings in the oil pan. Is it possible the other bearings got shredded? And can I get just the bottom com rod?
92 fzr600.
Full V&H exhaust
R6 VR
Full V&H exhaust
R6 VR
Re: 660 build
No, they are manufactured as matched pieces, which is they are only sold as a set - beware of eBayers selling mix 'n' match conrods and caps. Besides, you've beaten the conrod bearing surface oblong, even if you can't see it.
Buy a set, either new or from a trusted / trustable source, try again.
Buy a set, either new or from a trusted / trustable source, try again.
1989 3LN1 FZR250R, currently stock.
TTR Ignition Systems
TCI Repair and Ignition Transistor Upgrade
VRR Adaptor Harness
YZF600 TCI Adaptor
Running Light Fuse Carrier
TTR Ignition Systems
TCI Repair and Ignition Transistor Upgrade
VRR Adaptor Harness
YZF600 TCI Adaptor
Running Light Fuse Carrier
Re: 660 build
Thanks. I figured I couldn't. And where should I buy from? Bike bandit doesn't sell the con rod assembly. And I only need one.
92 fzr600.
Full V&H exhaust
R6 VR
Full V&H exhaust
R6 VR
Re: 660 build
So I've read and retread the manual. Installing the con rods the y mark needs to face to the left. Which side is left? Looking at it or sitting on the bike? Sorry about all the questions but I'm new to engine tear downs and I like doing everything myself. Thanks for all the help so far
92 fzr600.
Full V&H exhaust
R6 VR
Full V&H exhaust
R6 VR
Re: 660 build
generally when they use 'left' or 'right' it means sitting on the bike, it will be left.
As far as the engine goes, that means left is toward the flywheel.
On the other three rods, where is the 'y mark' ?
Just checked my manual it says "y mark toward the left crankshaft end" which means toward the flywheel.
Just curious, you got a new rod assembly? What bearing shells are you using, and how do you know that their clearance will be good?
When using a different rod and cap assy, you cannot just assume that a bearing of the same 'color code' will be appropriate. This procedure should be done using the color code to get close and then using plastigauge to verify clearance so that it can be adjusted if necessary (almost ALWAYS will BE necessary)...
It really IS that critical......
http://www.michiganmobileservice.com/
“A common mistake that people make when trying to design something completely foolproof is to underestimate the ingenuity of complete fools.”-Douglas Adams
http://www.youtube.com/user/reelrazor
“A common mistake that people make when trying to design something completely foolproof is to underestimate the ingenuity of complete fools.”-Douglas Adams
http://www.youtube.com/user/reelrazor