HOW-TO -Painting Plastics/Fiberglass Bodywork
Posted: Mon Jul 07, 2008 1:10 pm
Pics will follow shortly. For now, we'll get into things with the details.
First things first, make sure you have the time to get things done properly. Rushing a paint job will ensure that your bike does not look how you want it to, and you might find yourself re-doing all the work over again.
Materials you *should* use:
Sandpaper - 400 Grit, 800 Grit, 1000 Grit , 2000 Grit Wet/Dry automotive paper. It'll usually be black/grey in appearance
Sanding Block:

Fiberglass repair kit (resin and cloth) for FG panels or Plastex for Plastic panels:

Air compressor
Spray Gun (the one in picture is nearly identical to the one I used for my paint job):

NIOSH Half Face Reusable Respirator:

Disposable Paint Suit:

Nitrile or Latex Gloves
Masking tape if you're painting multiple colors or patterns/designs on the panels (Low Tack)
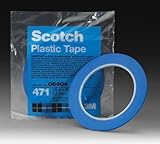
For pinstriping and initial graphic layout use: 3M(TM) Vinyl Tape 471 Blue - It is VERY flexible and can do curves with good precision and while it sticks real good, it does not lift the paint when pulled off.
Primer (Can be rattle can primer, however make sure you're getting a 'flex' Primer as the panels do move alot more than a car body does). Also make sure that the primer you purchase is one the list of recommended primers for the paint you buy. Don't go cheap with this.
Paint - Your local auto body supply store will have all you need. they'll mix the colors for you. Make sure you get the reducers and hardeners as well. Follow the directions for mixing, spraying and safety closely.
Tack Cloth:
[img]http://www.fonora.com/prodimg/img_prod_ ... 50.jpg[img]
A Garage to paint in preferrably so you can keep the breeze to a minimum. The paint's going to be spraying all over the place as is, so you don't want to lose 1/2 the paint coming out of the gun if you're working in a strong wind outside. If you have to work outdoors, make sure you are in an area somewhat sheltered from strong gusts and put up tarps to make a makeshift spray booth.
Alright, now most of those items you can get pretty easily, but don't skimp out on the respirator. That's probably the single most important item to purchase if you're going to be painting your panels yourself. They say that the fumes from the paint is toxic, well, it is VERY. I made the mistake of taking off the respirator in a closed garage not 2 minutes after spraying. My lungs burned and there wasn't enough oxygen to breathe in.. I had to open the main door and get the hell out. Don't mess around with this stuff. Also ensure that wherever you're working you have adequate ventillation. Yes, I had to get out of the garage, but I had a fan blowing out of a window to help pull all the overspray out of the garage as well.
Now that you have your items purchased you can get started on the repairs of your bodywork if needed. For Fiberglass panels, refer to the instructions in your Repair Kit that you purchased for information on how to repair any cracks. Likewise for your Plastex repair on plastic panels. I'm not going to explain how to repair the panels by each method, there's plenty of sources out there for that anyways.
Once you've completed any and all repairs to your bodywork, sanded it smooth, and are happy with the finish, then you are ready to move onto the next stage and that is priming your parts. First, you must take either the 400 or 800 grit sandpaper you purchased and sand each panel. You do not have to remove all the old paint on the parts, just enough to scuff the surface up for the primer to adhere to when you spray it. Once each item is ready to be painted, bring them all into the booth or area you have set up for painting. Spray them one at a time from a distance of about 8-10" away from the surface. There's no need to slop it on there. Nice thin easy coats will cover all that up and keep the finish uniform. Most primers I've ever used give a time of recoat at up to 1hr with a few hours for topcoating(painting) so you can realistically prime one item, move it out of the way, and finish the rest of the panels before returning to recoat the primer on the first item again. The next step is up to you. You can either wait 24 hours to ensure that the primer is cured a little better or you can do like me and wait a couple of hours and get right back at it.. Yes, I know I said patience, but I don't have much ...
...
Alright now we've got all our panels primed, you should be able to see and feel any areas that need to be touched up with spot putty. If it didn't come in your Fiberglass repair kit, then go buy some . What you want is a finish that's smooth, free of waves, dimples, scratches or any other deformities as it WILL show up in your paint. Now, take the 1000 grit sandpaper and assuming that you're done with the inperfections, re-sand the primer. Use the sanding block for larger areas and just use pieces of paper for the hard to reach and small areas. Be thorough because your next coat of anything is going to be your finished product. Take any dust ridges off. This can either be done via dry sanding or wet sanding. I prefer wet-sanding because there's no dust particles floating around afterwards. Once you've sanded the panel, take a dry cloth and wipe any excess dust particles away. Then using a tack cloth (wear gloves cause tack cloths are tacky.. duh! and make your hands sticky afterwards) take the rest of the excess off the panel(s). Run your hand across the surface. It should feel extremely smooth, almost too smooth. But that's what you want. Repeat these last few steps for all the panels you have primed. For best results, let the panels sit overnight and tackle the rest the next day or when you have time again.
........ The rest of the HOW-TO to follow.....
First things first, make sure you have the time to get things done properly. Rushing a paint job will ensure that your bike does not look how you want it to, and you might find yourself re-doing all the work over again.
Materials you *should* use:
Sandpaper - 400 Grit, 800 Grit, 1000 Grit , 2000 Grit Wet/Dry automotive paper. It'll usually be black/grey in appearance
Sanding Block:
Fiberglass repair kit (resin and cloth) for FG panels or Plastex for Plastic panels:
Air compressor
Spray Gun (the one in picture is nearly identical to the one I used for my paint job):
NIOSH Half Face Reusable Respirator:
Disposable Paint Suit:
Nitrile or Latex Gloves
Masking tape if you're painting multiple colors or patterns/designs on the panels (Low Tack)
For pinstriping and initial graphic layout use: 3M(TM) Vinyl Tape 471 Blue - It is VERY flexible and can do curves with good precision and while it sticks real good, it does not lift the paint when pulled off.
Primer (Can be rattle can primer, however make sure you're getting a 'flex' Primer as the panels do move alot more than a car body does). Also make sure that the primer you purchase is one the list of recommended primers for the paint you buy. Don't go cheap with this.
Paint - Your local auto body supply store will have all you need. they'll mix the colors for you. Make sure you get the reducers and hardeners as well. Follow the directions for mixing, spraying and safety closely.
Tack Cloth:
[img]http://www.fonora.com/prodimg/img_prod_ ... 50.jpg[img]
A Garage to paint in preferrably so you can keep the breeze to a minimum. The paint's going to be spraying all over the place as is, so you don't want to lose 1/2 the paint coming out of the gun if you're working in a strong wind outside. If you have to work outdoors, make sure you are in an area somewhat sheltered from strong gusts and put up tarps to make a makeshift spray booth.
Alright, now most of those items you can get pretty easily, but don't skimp out on the respirator. That's probably the single most important item to purchase if you're going to be painting your panels yourself. They say that the fumes from the paint is toxic, well, it is VERY. I made the mistake of taking off the respirator in a closed garage not 2 minutes after spraying. My lungs burned and there wasn't enough oxygen to breathe in.. I had to open the main door and get the hell out. Don't mess around with this stuff. Also ensure that wherever you're working you have adequate ventillation. Yes, I had to get out of the garage, but I had a fan blowing out of a window to help pull all the overspray out of the garage as well.
Now that you have your items purchased you can get started on the repairs of your bodywork if needed. For Fiberglass panels, refer to the instructions in your Repair Kit that you purchased for information on how to repair any cracks. Likewise for your Plastex repair on plastic panels. I'm not going to explain how to repair the panels by each method, there's plenty of sources out there for that anyways.
Once you've completed any and all repairs to your bodywork, sanded it smooth, and are happy with the finish, then you are ready to move onto the next stage and that is priming your parts. First, you must take either the 400 or 800 grit sandpaper you purchased and sand each panel. You do not have to remove all the old paint on the parts, just enough to scuff the surface up for the primer to adhere to when you spray it. Once each item is ready to be painted, bring them all into the booth or area you have set up for painting. Spray them one at a time from a distance of about 8-10" away from the surface. There's no need to slop it on there. Nice thin easy coats will cover all that up and keep the finish uniform. Most primers I've ever used give a time of recoat at up to 1hr with a few hours for topcoating(painting) so you can realistically prime one item, move it out of the way, and finish the rest of the panels before returning to recoat the primer on the first item again. The next step is up to you. You can either wait 24 hours to ensure that the primer is cured a little better or you can do like me and wait a couple of hours and get right back at it.. Yes, I know I said patience, but I don't have much
Alright now we've got all our panels primed, you should be able to see and feel any areas that need to be touched up with spot putty. If it didn't come in your Fiberglass repair kit, then go buy some
........ The rest of the HOW-TO to follow.....