
One of the other things I did last year was install a volt gauge and an an aftermarket temp gauge.. When I bought the gauges, a third one came with it.. An oil pressure gauge.. So we've been trying to come up with ways to install it without drilling into the motor.. We found a way to do it, and the part we actually used was off my 400 motor.. though the same part on the 600 motor will work (I'll explain later... we goofed.. )
Anyways.. First, we'll need a list of parts and for the purpose of this installation, I'll reference the gauge I'm using naturally but any gauge should work. just the parts might differ in size.
8100 1-1/2” Volt Triple Gauge Kit available anywhere really I would imagine, but http://www.iequus.com has them too

Now, the cool thing about the gauge kit is that there's 3 different color rubber light covers to make it suit your bike.. There's green, red, blue or you can use none and it'll just be a regular light color...
1/4" npt brass compression "tee" fitting
Image for illustration purposes.. This isn't the exact item, but it's very similar.

1/4" x 8" piece of brake line..
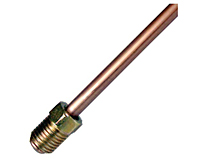
Local automotive shop should carry these.. You'll have to grind down the flair on the ends of the tubes if there are any so the compression nut and furrel fits over the line..
1/4" npt to (will update when I get exact size) reducer to accomodate nylon tubing going to the gauge
FZR Oil Delivery Pipe
This is the oil pipe going from the bottom of the crank to the head next to the oil filter. You will be cutting this piece, and I will explain the process down further
Ok, Now that you've obtained your parts you can get started. Be forewarned though. The delivery pipe I spoke about earlier will be cut and rendered useless if you do not follow the exact steps listed below. I can not be held responsible for any damages and you may do this mod at your own risk.
With that out of the way, we actually can get started now..
The only place that's realistically viable to install the "Tee" fitting is just above the middle bolt bracket for the oil delivery pipe. Too high and you're getting into the way of the headers. Too low and there's too many bends in the pipe and the oil filter also can become a problem depending on routing. Don't cut it just yet. There's some measuring to be done.
Take the "Tee" and measure the overall length of it(This is on the straight-through portion of the fitting). For argument's sake, let's say it's 1".. (each "Tee" will vary). Now, using a vernier caliper measure the distance from one end to the seat where the pipe will sit.. Write that number down. now on the other end, do the same thing.. write it down. Let's say each "seat" is 0.25" from the end..
This gives you an overall length of 1" for the "Tee" and 0.5" where the pipe's going to go in. This leaves 0.5" of gap. That number is also the amount of section of piping that needs to be cut off the delivery pipe in order to keep the same overall length and still have the ability to re-install it on the motor... See this is where I screwed up, sort of.. we cut the right length off, but did it up too high and the headers were going to interfere. Luckily I had the delivery pipe from the 400 motor in the garage still and well, it was 1/2" short compared to the 600 pipe. In my case, I only had to cut the original pipe and put the fitting in there since I needed .5" of length to make it work..
Anyways, enough about that... Let's continue..
Since we've got our pipe cut now, it's time to clean up the ends and make sure there's no metal filings or burrs there that will inadvertently get sucked into the motor.. take a utility knife or whatever and ream the inside of both pieces of pipe to deburr it.. Then either with sandpaper or emery cloth, or even a file.. clean up the outside of either ends of the pipe you cut. make it smooth but don't take too much material away from it as this could affect seating of the compression furrel.. Once it's smooth, use an air gun and blow out any excess shavings, just to be sure.
What to do next. Install the compression nuts and furrels onto the pipe ends (these came with the "tee"). Starting with whichever end you like, insert the end of pipe into one end of the "tee" making sure it's seated properly all the way in. Tighten down the compression nut onto the pipe. Don't go too tight to strip it, but tight enough that the furrel bites into the pipe. Once you've tightened it down, loosen it off so that you can check to see if the furrel has bitten into the pipe. If it has, then proceed to re-tighten the nut and move onto the other end of the "tee" repeating the same steps you just completed.
Now that you've got a complete piece of pipe with the "tee" in place, you can put the banjo's back in their place and torque the assembly to specs. The easiest way to face the pipe "tee" is to place it so it's facing the left side of the bike (when you're sitting on it). Here is a pic of what the setup will look like up to now.

The next step is to get the brake line piece assembled and installed onto the "tee". If the brake-line that you've purchased has flair's on the ends, then you will need to grind them away so that they're smooth and burr free. This will allow the furrel and compression nut to slide over the end. Also, like the delivery pipe, make sure that the inside is burr free and blow any filings out with the air gun. Once you have readied the line, move onto installation and bending. Start with the end nearest to the "tee" first. Get the compression nut and furrel on and tighten it into the "tee". Again, loosen it off and check to see it's got a good bite and then re-tighten the nut. Now you can bend the tube, ensuring that it doesn't kink as you do. A trick for this is that if you have any single strand, decent gauge, copper wire lying around, wrap it around the area that's going to have the bend in it. This will help in the preventing of kinking. This is a trial and error to figure out the exact positioning. The following picture illustrates how mine came out and with it in place, it sits just behind the down-tube and is not obstructed in any way. Once you're satisfied with the location. You can then put the reducer fitting on the opposite end. By now you should know how it's done and I won't delve deeper into that aspect as we've covered it already a few times. I will update with the exact size of the reducer when I get the information on it. Keep in mind, this is likely the only part that should be different from my setup as the hose may or may not be different depending on which gauge you are going to use.

At this point, you are essentially finished the main plumbing of the gauge & lines. There's only a couple of small things left to do. First, you must find a place to mount the gauge. In my case, I have already removed the stock temp gauge since I have the aftermarket ones in my tank cover. I'm also doing this on a 400 frame, and my gauges are from the 400.. (minus the tach). So the setup on the gauge cluster is a little different I believe (not sure on the 600).. What I did was take a piece of 1/8" aluminum plate that I had and there was a hole already drilled through it with the mill (was working on something). I just made the hole big enough so the oil pressure gauge fit through it, drilled a couple holes in the old temp gauge mount location and put 2 self tapping bolts to hold it together. It looks a little crude, but until I fix my cnc spindle or get a new one, it'll do.
Placeholder for future picture
Now that you've found a place for the gauge, you can run the feeder up through the frame whichever way you'd like. I'll post pics of my setup once I get it run completely to help finish off this How-to. There's a compression nut & furrel on the back of the gauge and once you've run the nylon tube and cut it to length, you install it like the others. The Only thing I might stress here is that you can't tighten the compression nut too much on this because the hose is only nylon and the furrel can twist when tightening too tight or could crush the line. It's just gotta get a good enough bite to ensure that there is no leaking.
The last item is wiring in the light for the gauge (if applicable) and you should be good to go. Double check all your connections, and fire up the bike. Check for leaks and enjoy your new oil pressure gauge on the bike.
Brian
.... to be continued.


