

Looks really nice..hope the lights are water-protected (otherways a small stripe of acrylic plastics should help)...
1988 project
Moderators: Site Director, FZR Forum Moderators
Re: 1988 project
Looks really nice..hope the lights are water-protected (otherways a small stripe of acrylic plastics should help)...
"The social dynamics of the net are a direct consequence of the fact that nobody has yet developed a Remote Strangulation Protocol." -- Larry Wall
Want Pics? Then have a look at my galleries...different topics: Bike and Car restauration, exhibitions, Trackdays (no, not me on the Track until now), carneval in cologne, other things..
Want Pics? Then have a look at my galleries...different topics: Bike and Car restauration, exhibitions, Trackdays (no, not me on the Track until now), carneval in cologne, other things..

Re: 1988 project
Yes, they are waterproof. But I usually don't ride in the rain. Hate getting the bike wet.
Just need to clean up the wiring once the license plate is done. There will be wires coming from there too.
I have those small lights that are integrated in the license plate mounting bolts.
Just need to clean up the wiring once the license plate is done. There will be wires coming from there too.
I have those small lights that are integrated in the license plate mounting bolts.
Re: 1988 project
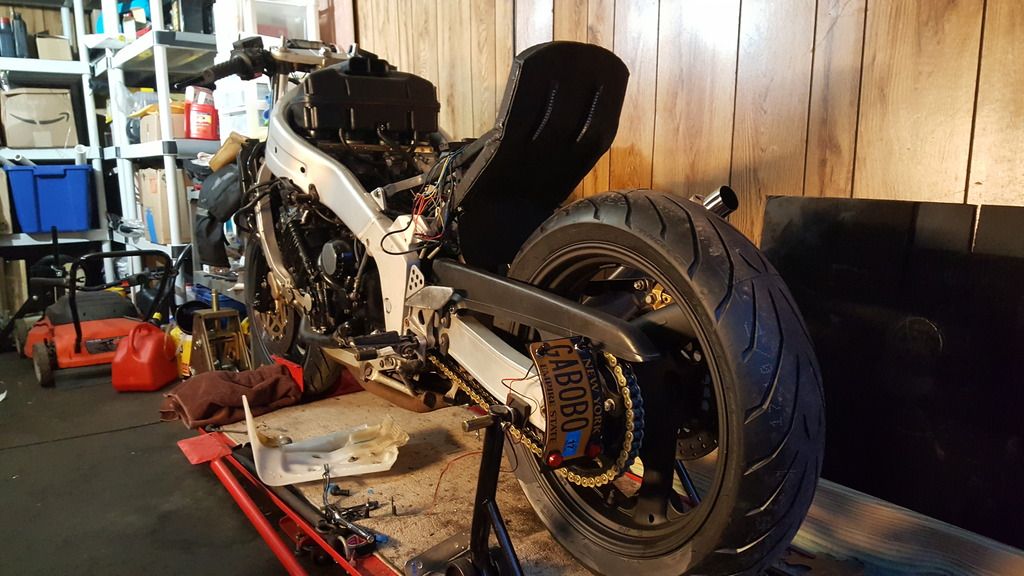
Finished the license plate holder. The wires (top bolts have integrated led) will run inside a tube along the chain guard. I'm also going to take the reflectors off and replace them with black bolts. Need to look at my setup again later and decide if I like it or not. I might extend a bit to have it sit behind the chain and more inwards.
Re: 1988 project
Moved it back and closer to wheel.
Re: 1988 project
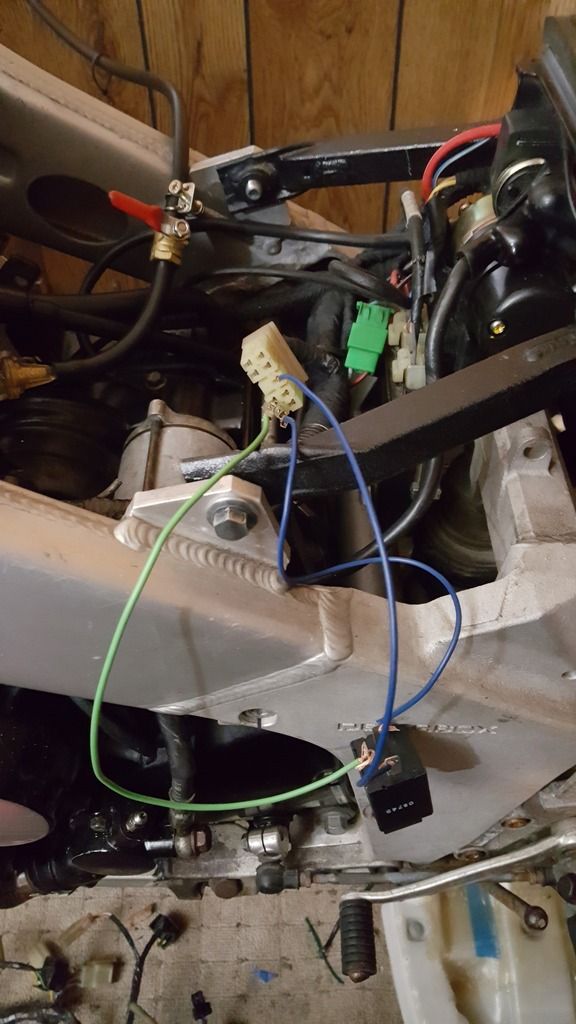
Getting to a point where I need to fix my led turns. They are not flashing. There is this huge flasher relay. Apparently it takes care of other things as well.
I can either pull the wires needed and wire in a three pin led flasher relay or I add resistors.
Any other ideas/ways to do it?
Here is what I found on a different website:
Identification:
- large rectangular black plastic relay, inked 41R-71 and then "ND FX257N"
Harness connector wire colors:
* Red wire with white tracer stripe (starter cut-off relay)
* Blue wire with white tracer stripe (starter cut-off relay)
* another Blue wire with white tracer stripe (starter cut-off relay)
* Black wire with yellow tracer stripe (starter cut-off relay)
* Black solid wire (common ground)
* Yellow wire with red tracer stripe (self-canceller)
* Brown wire with white tracer stripe (signal flasher)
* White wire with green tracer stripe (self-canceller)
* Brown solid wire (signal flasher)
Re: 1988 project
I guess best way should be adding resistors which can bear the expected wattage-load...mostly the dealer who sold the led-flashes should be able to tell you which resistors are nedded..if they're from a common known brand its possible to find the needed values already on the manufacturers homepage in their faq-collection
The usual Wattage for the original flashers is noticed inside the service manual for comparision to values given in flasher-manufacturers faqs
Edit:Example-Link to some common used (depending on the original load of the OEM-Flashers) Resistors for Kellermann-LED-Flashers: http://test.kellermann-online.com/de/pr ... gruppe/139
Edit2: .and remember that LED-Flashers care for the direction where the current comes from,opposite to the original flashers, so check where to put the + Wire and the - Wire, not that thats the reason why there's actually nothing flashing on demand
"The social dynamics of the net are a direct consequence of the fact that nobody has yet developed a Remote Strangulation Protocol." -- Larry Wall
Want Pics? Then have a look at my galleries...different topics: Bike and Car restauration, exhibitions, Trackdays (no, not me on the Track until now), carneval in cologne, other things..
Want Pics? Then have a look at my galleries...different topics: Bike and Car restauration, exhibitions, Trackdays (no, not me on the Track until now), carneval in cologne, other things..
Re: 1988 project
Picked up a three pin relay at an auto parts store. Wired it up temporarily and work's like a charm.
I'll just remove the two wires in question from the original connector, slap some female connector thingies on and hook them up to the flasher relay. A ground wire to complete the job and done.
Much better than adding four resistors that would need to be attached somewhere etc.
Now the tail stuff is done, putting on front turns and wiring up the headlight is all that's left.
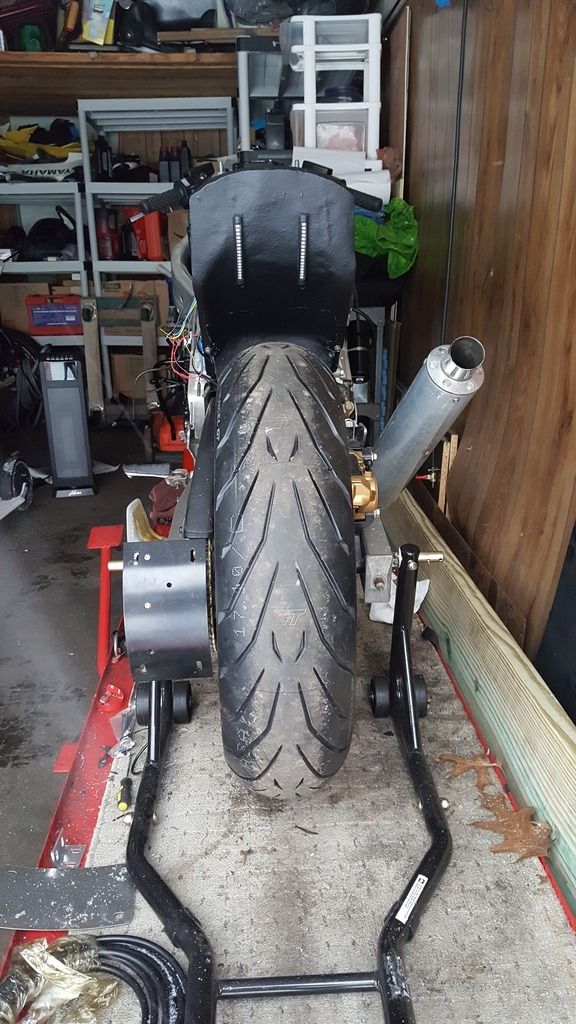
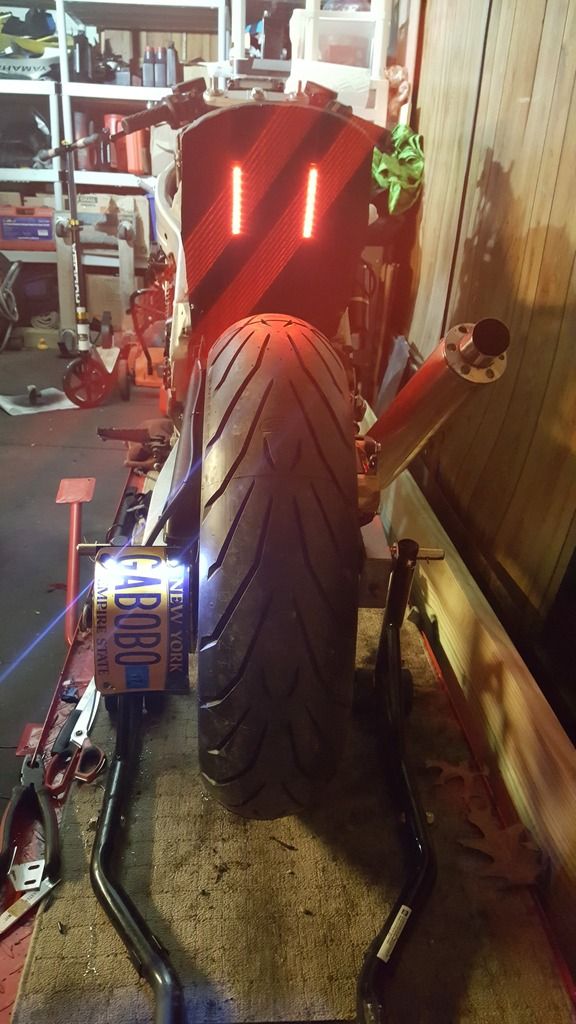
Each led strip is running and brake light in red, turning on turn signal will make them flash in amber. I like the setup because I don't need extra turns in the back. Cleaner look.
Pick of temp setup for testing
Front turns for now..

I'll just remove the two wires in question from the original connector, slap some female connector thingies on and hook them up to the flasher relay. A ground wire to complete the job and done.
Much better than adding four resistors that would need to be attached somewhere etc.
Now the tail stuff is done, putting on front turns and wiring up the headlight is all that's left.
Each led strip is running and brake light in red, turning on turn signal will make them flash in amber. I like the setup because I don't need extra turns in the back. Cleaner look.
Pick of temp setup for testing
Front turns for now..
Re: 1988 project
Well...
Looked into relocating the ignition switch and replacing it with an aftermarket one.
I have three wires on the harness, red, brown and blue. The new switch has four. The fourth is for parking lights.
I am baffled now because I was not able to make things work.
I either have lights but no starter, or I have starter but no lights.
The red wire on our harness is positive in, correct?
Re: 1988 project
Usually red is battery-positive, brown is switched positive and blue is ground/negative. For the US-Market Motorcyclemodels the wire for the parking lights should usually not be needed as there the headlights are dimmed for front parkinglight functionality, here in europe theres a separate bulb for front parkinglight and the additional wire would be needed for this little additional bulb
"The social dynamics of the net are a direct consequence of the fact that nobody has yet developed a Remote Strangulation Protocol." -- Larry Wall
Want Pics? Then have a look at my galleries...different topics: Bike and Car restauration, exhibitions, Trackdays (no, not me on the Track until now), carneval in cologne, other things..
Want Pics? Then have a look at my galleries...different topics: Bike and Car restauration, exhibitions, Trackdays (no, not me on the Track until now), carneval in cologne, other things..
Re: 1988 project
Ordered a three pin ignition switch and works perfectly now. I relocated the switch to the left air ducts (hole in the frame).
Headlight, turn and horn hookup is left to do. And tank to hook up. I don't like that part in case of leaks. It always turns into a mess if leaking
Headlight, turn and horn hookup is left to do. And tank to hook up. I don't like that part in case of leaks. It always turns into a mess if leaking
Re: 1988 project
Tank is on and hooked up. No leaks and fuel pump works. Great news.
Horn, front turns and headlight are connected as well and all in working order. I have not yet figured out the front brake switch.
I cleaned the contacts, but still a no go. If I connect both wires, the light should come on, no? There is a brown and a green/yellow if I remember correctly.
I'll need to trouble shoot next. Rear brake is fine.
Other than that, bike should be rideable and I'll take her for a quick spin later today. Maybe even drop her off at the shop to get the seat upholstered.
Re: 1988 project
well, test ride did not happen.
fuel was not getting to the carbs. it idled for a while then died. i think it might be the fuel pump, but further fuel pump tests did not happen because the battery was low and finally died on me too. charging battery over the day and will see what i can find out tomorrow morning.
fuel was not getting to the carbs. it idled for a while then died. i think it might be the fuel pump, but further fuel pump tests did not happen because the battery was low and finally died on me too. charging battery over the day and will see what i can find out tomorrow morning.
Re: 1988 project
Just had a thought: maybe I connected the fuel lines to the pump the wrong way - in vs out.
What goes where?
What goes where?
Re: 1988 project
just remembered that there was "in" stamped on the fuel pump housing. the line from the tank goes there. so it should be correct. but should be easy to test by swapping the lines
Re: 1988 project
Alrighty.. took pump off the bike and set it up on table, connected to a battery. It pumps just fine. Hmmm.
I did not have much fuel in the tank, I am starting to get the feeling that this might be my actual problem. Also, I ordered a used replacement pump. The aftermarket one I have now has a wider pipe diameter. Not sure if that makes a difference, but just in case. The original pump is leaking from the pump body somewhere and is pretty much useless.
I think I'll connect the aftermarket one again and set everything up without tank for now to see its behavior on the bike itself. This is to make sure there is no power interruption due to wiring issues somewhere.
So close to riding and yet so far.